This is an english translation of the original german blog entry.
After shortening the legs of my jeans by myself I became a bit megalomaniac and started to consider sewing my own jeans …
At first I thought that I could do it by hand – think about it, about 200 years ago everything was hand sewn. But I decided to go another route – a less painful route 😉
And when I realized that a good used sewing machine could be bought for about 20 Euros, my decision was made to give the idea a try.
Buying a used Sewing Machine – for example the Singer 7184
When I was a child I often watched my mother sewing on her white Singer 744 from the 1970s. Since this machine is still working (after only minor repairs) I decided to look for a singer as well.
Finally I acquired a Singer 7184, a machine that was build in the 1980s and is of a solid and rigid quality, all the important parts are made of metal. Also it is said that this model is even able to sew leather so I thought it might handle Denim as well.
I bought this machine two weeks before I finished the jeans.
After a long search on the internet I finally found a download link for the machines manual.
Singer-Website – Take care, you have to type the model number 7174 instead of 7184.
The same day I bought the machine I also went to a local store to buy some dark blue indigo denim. The saleswoman said that 150 x 150 cm would be sufficient for a Jeans in the size W32 L32. She was absolutely right.
The first week I was fighting with the machine. As stupid as I was I first tried to sew jersey (an old T-Shirt) – there is no fabric that is harder to sew. Several needles broke until I managed to handle that material – thanks to various Blog and Forum entries.
In spite of my failures I gained new confidence while the people around me started to think I am a lunatic – I guess. My wife told her friends that she has an insane husband that put in his head to learn sewing on a jeans – instead of something easier like a skirt for example. Nice try 😉
Her friends told me about their miscarried attempts to sew their own jeans and a friend of mine laughed at me as I told him, that I wanted to wear that jeans at work.
Some realy amazing instructions that I found on the web kept me going on (sorry, they are in german):
- N!NAs Anleitung im hobbyschneiderin24 Forum
- Beitrag im Forum Nähfabrik
- http://naehfabrik.forumprofi.de/stufe-5-kleidung-fortgeschrittene-f250/nÄhen-lernen-jeanshose-t2400.html
- http://roetsch.wordpress.com/2014/01/22/jeans-selbst-genaht/
- https://roetsch.wordpress.com/2015/02/08/how-to-sew-a-jeans-a-tutorial-in-four-steps-1-sewing-pockets/
A big Thank You to the authors of these great articles.
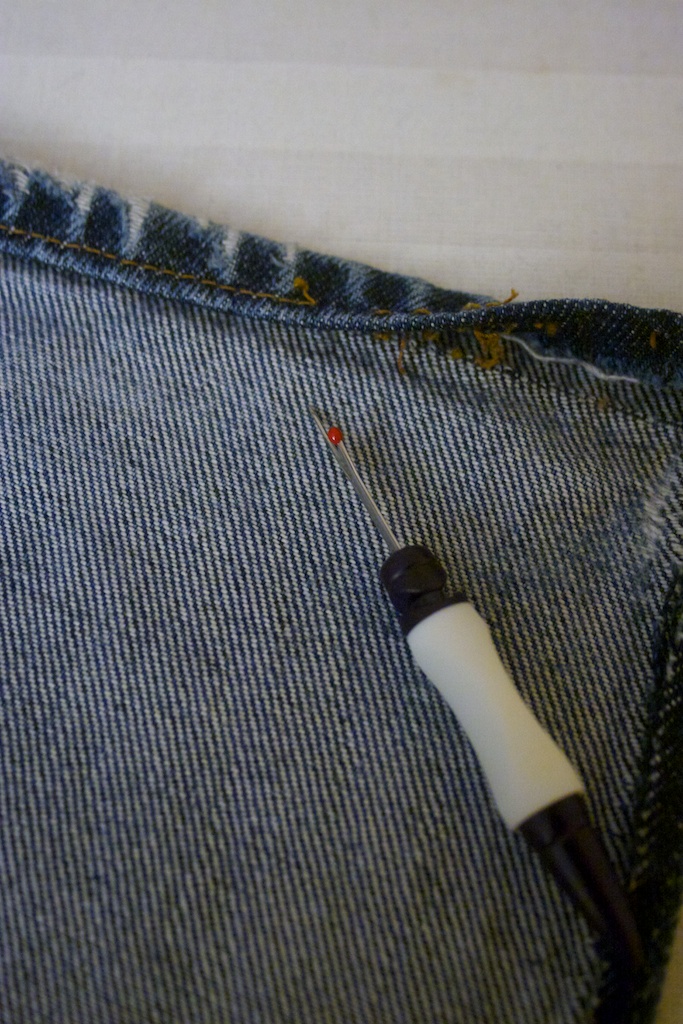 I started by unraveling the threads of an old destroyed jeans that fit me well …
Creating a pattern: unsewing an old Jeans
I started by unraveling an old jeans (Levi’s 501), which fit me well but was ripped already.
It is not needed to unravel the whole jeans, one half is enough. It took me about a whole evening to put it into pieces.
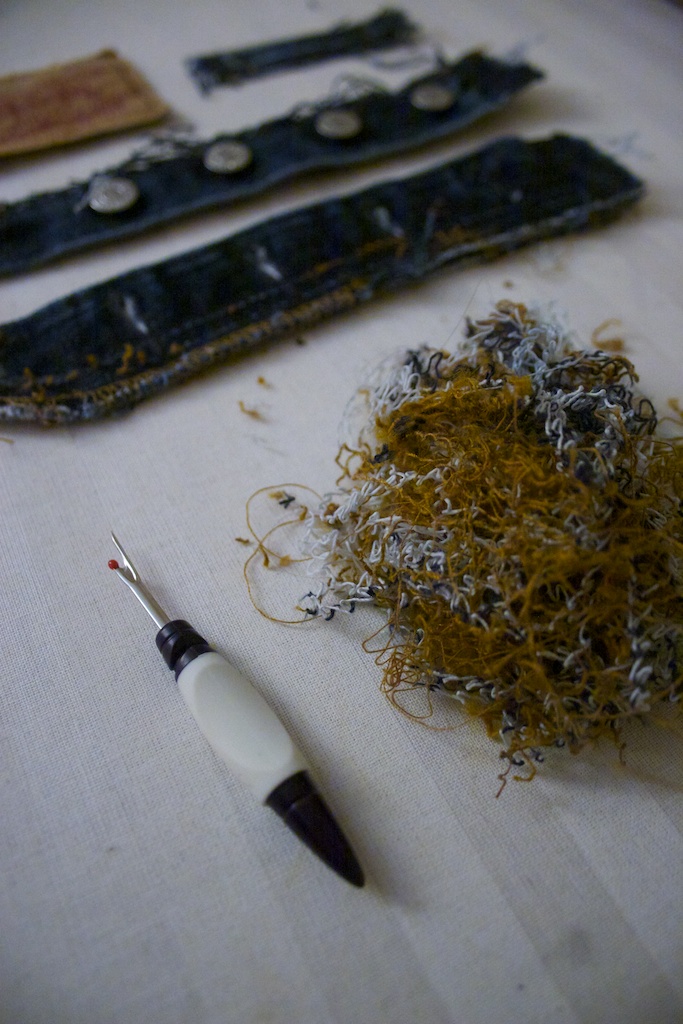 Unraveled threads.
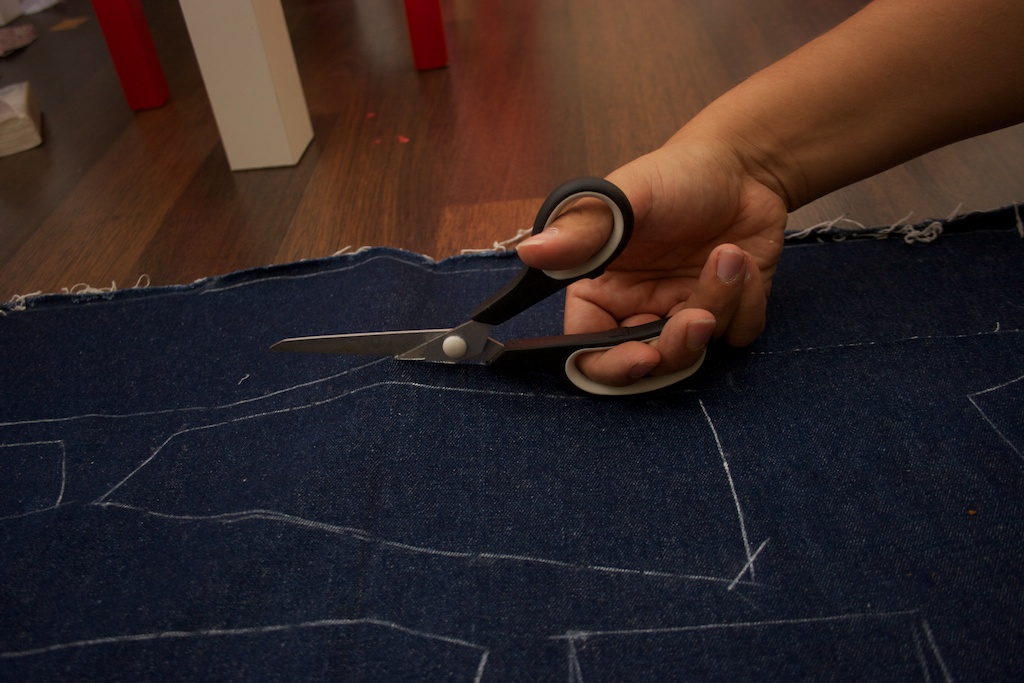
Cutting the fabric
At first I ironed the parts …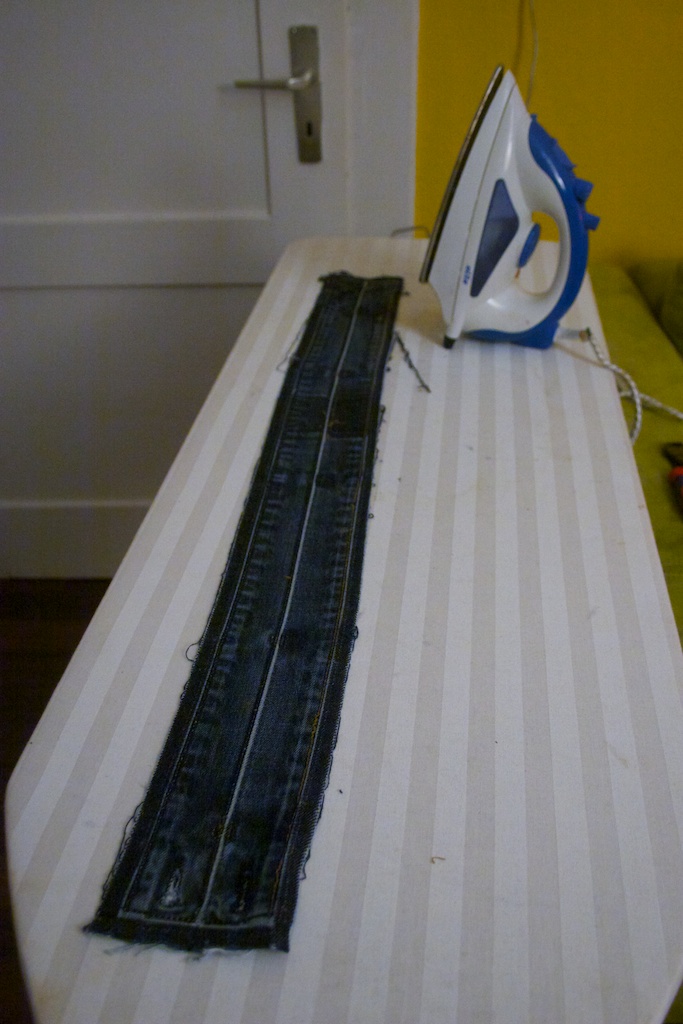 Ironing of the parts
… and than I laid them out on the fabric. Here you have to take care, that the warp (the blue thread of the fabric) parallels the longer side of the legs. Everything has to be put so, that the warp goes from the bottom to the top.
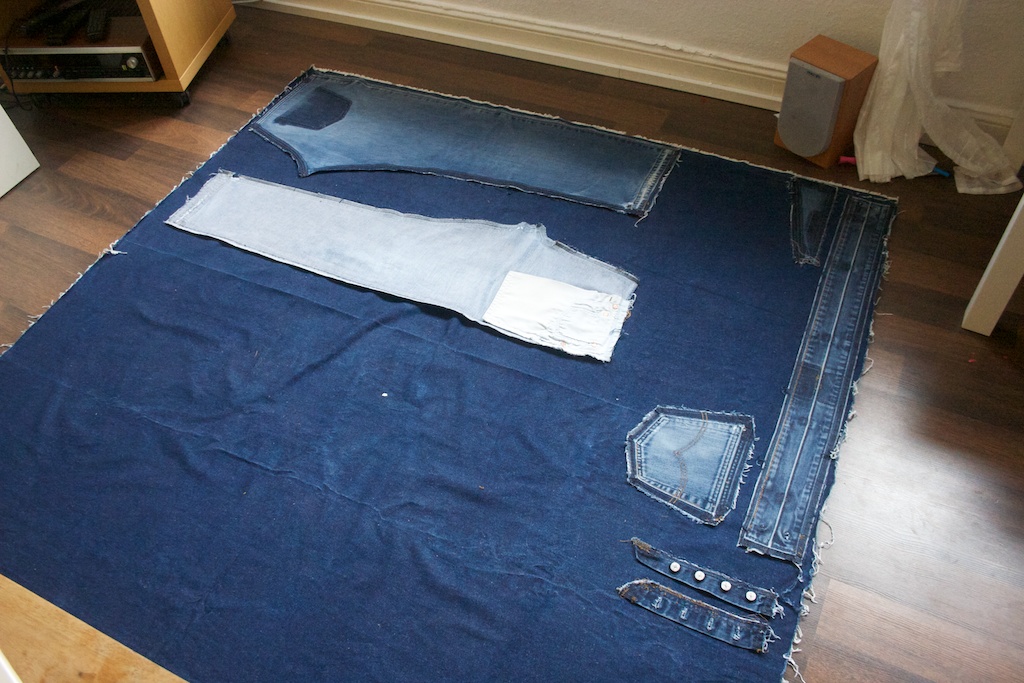 Lay out the pattern.
If you unwrap the seam allowances the fades look like painted :).
Now the shapes of the parts need to be traced on the fabric. I used special tailors chalk that you can obtain in different colors.
The trend to wear jeans in an Used-Look might have been invented by the Japanese jeans-label Edwin in the 1950s, while they were importing used army wear to Japan.
This reminds me of a YouTube Video I saw, that describes the industrial production of a jeans. The Labour that accumulates in one jeans is a mere 15 minutes! The signs of use are made with sandpaper – a jeans ages about five years by this treatment.
As a contrast a tailor in New York who creates made-to-measure Levi’s Jeans :
https://www.youtube.com/watch?v=F0wE3H3WTBc
The bad side of the jeans production – and the reason why we do not want to buy pre aged jeans and instead cling to self tailored or RAW denim jeans. (german audio only):
https://www.youtube.com/watch?v=vI7RsCezFgM
And that’s why we concentrate on self sewing again.
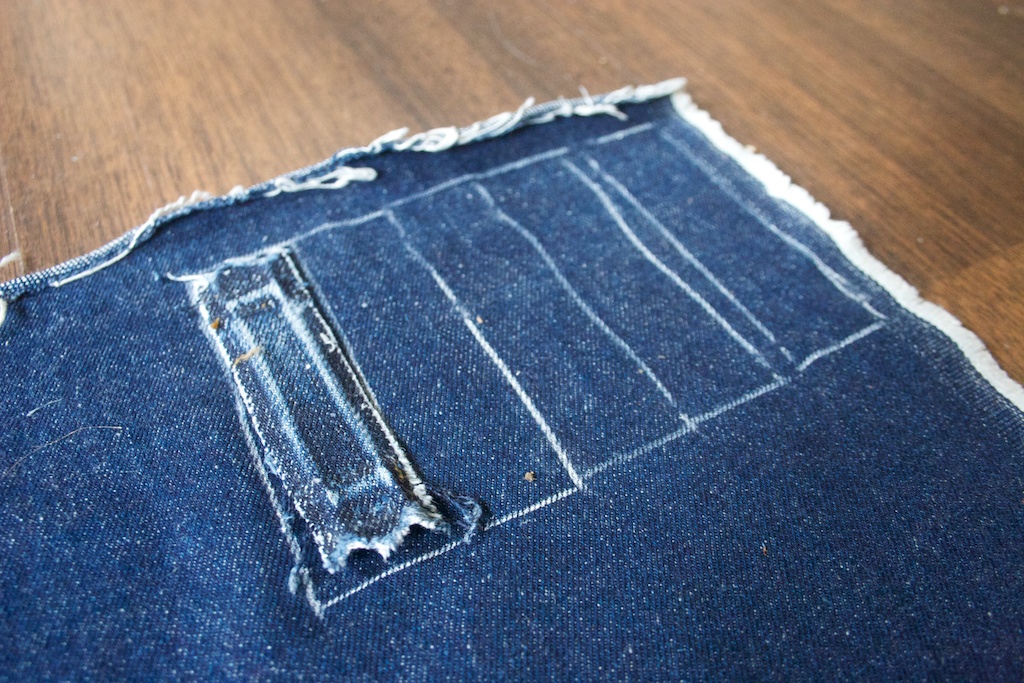
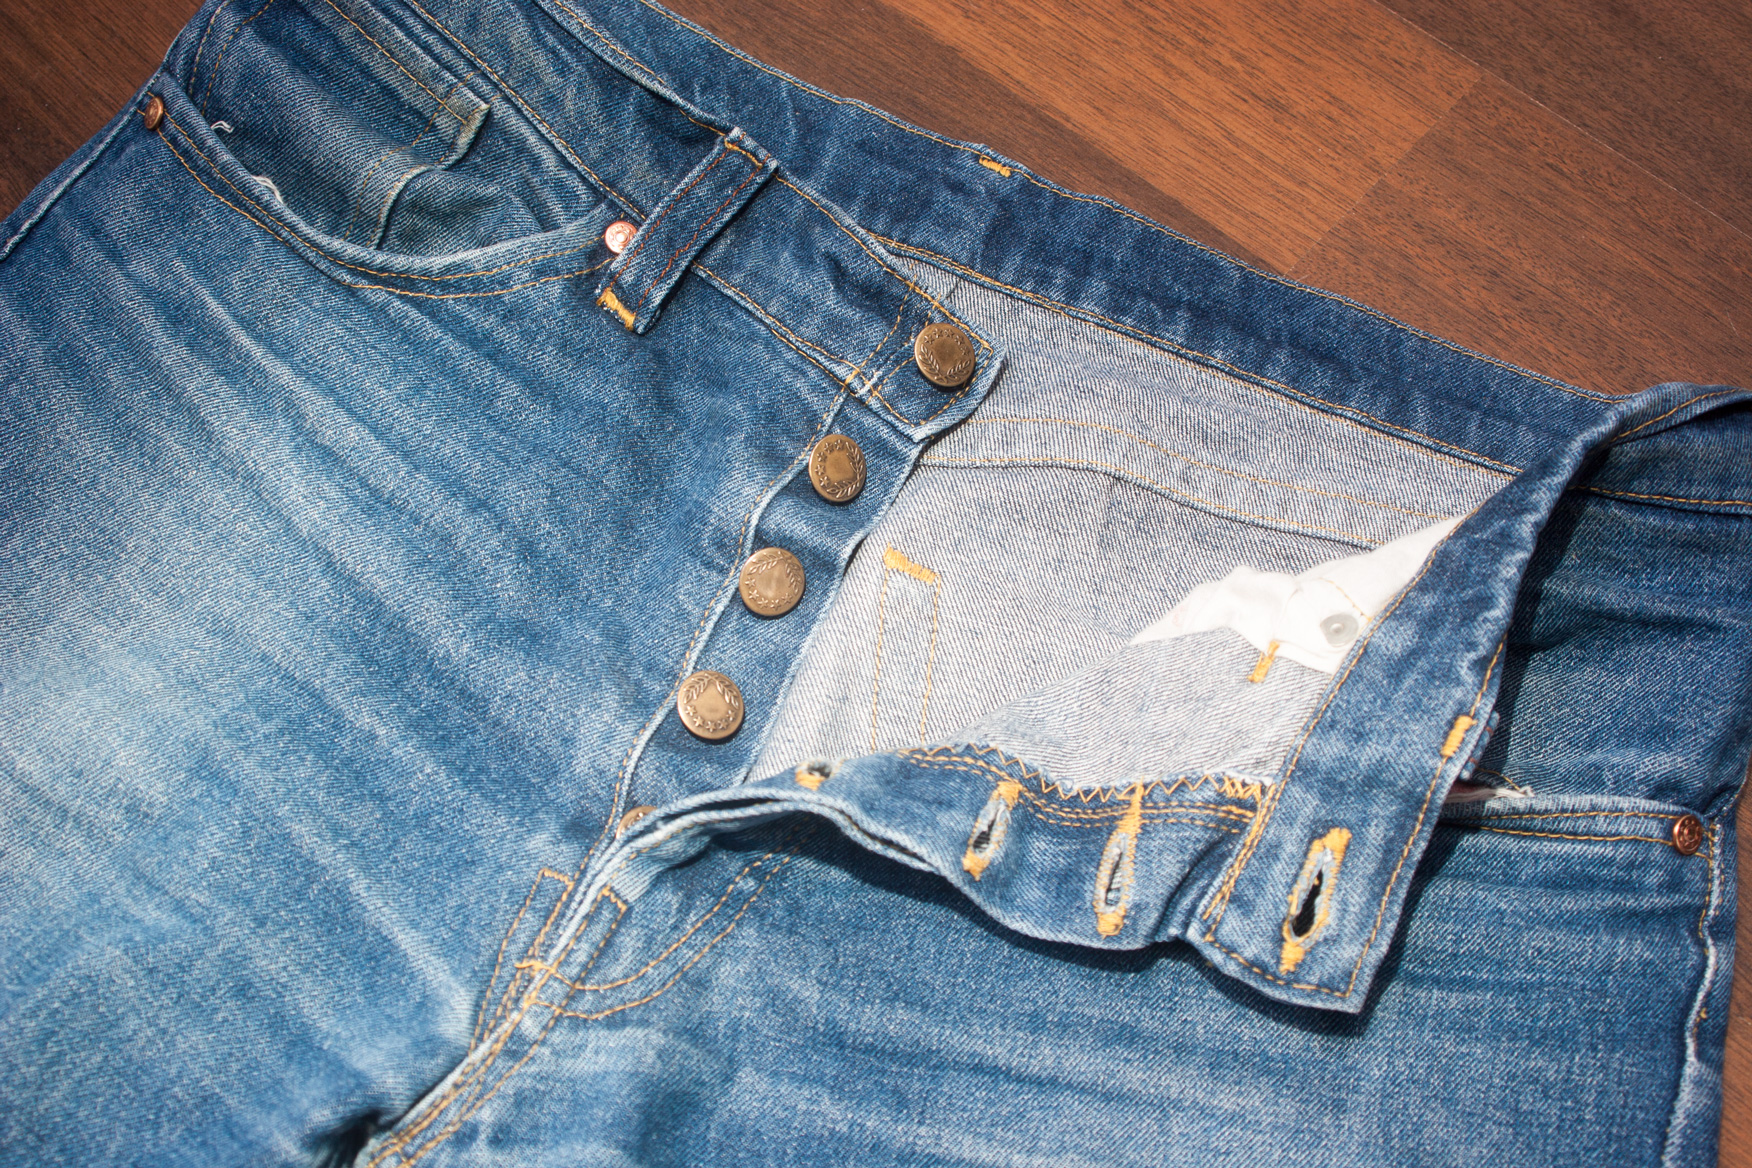
Here you can see the button fly:
 Tracing the fly
Don’t copy my stupid way to trace the belt loops:
 .
.
It is much easier to make them in one long strip and to cut them afterwards:
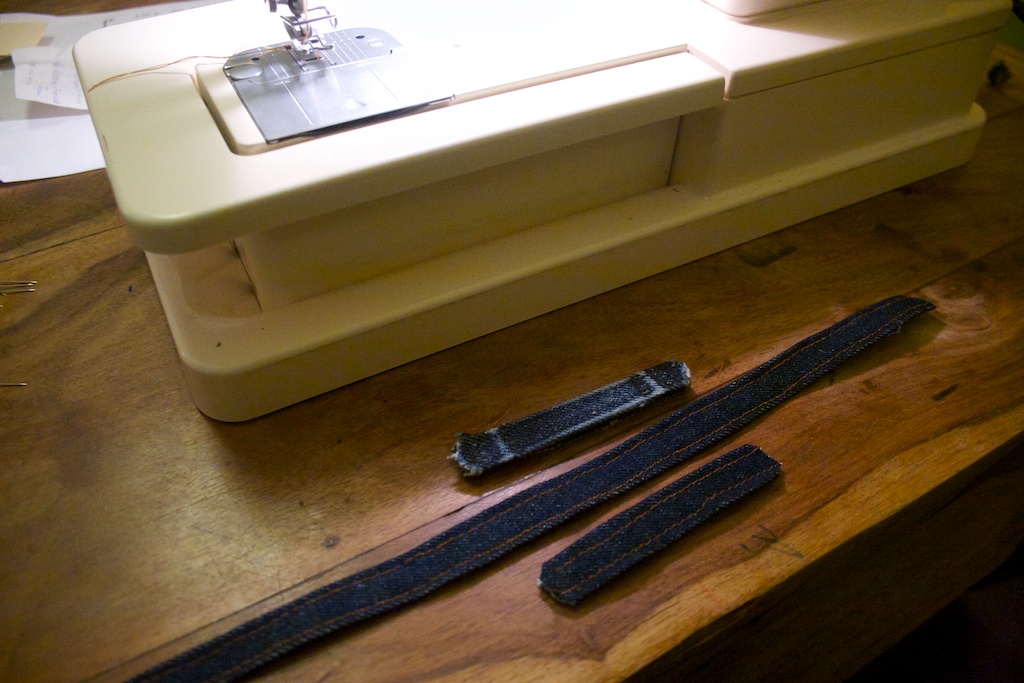
I serged the back side of the belt loops by hand.
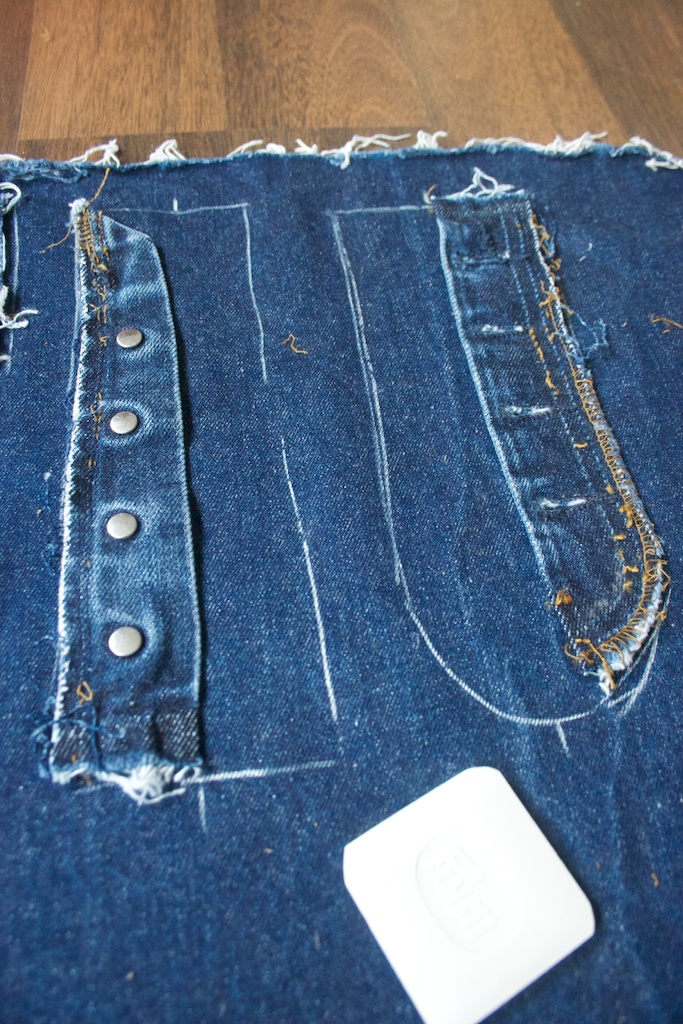
In order to trace the pockets cut out I marked their position together with the seam allowance.
 The rest has to be added by guessing.
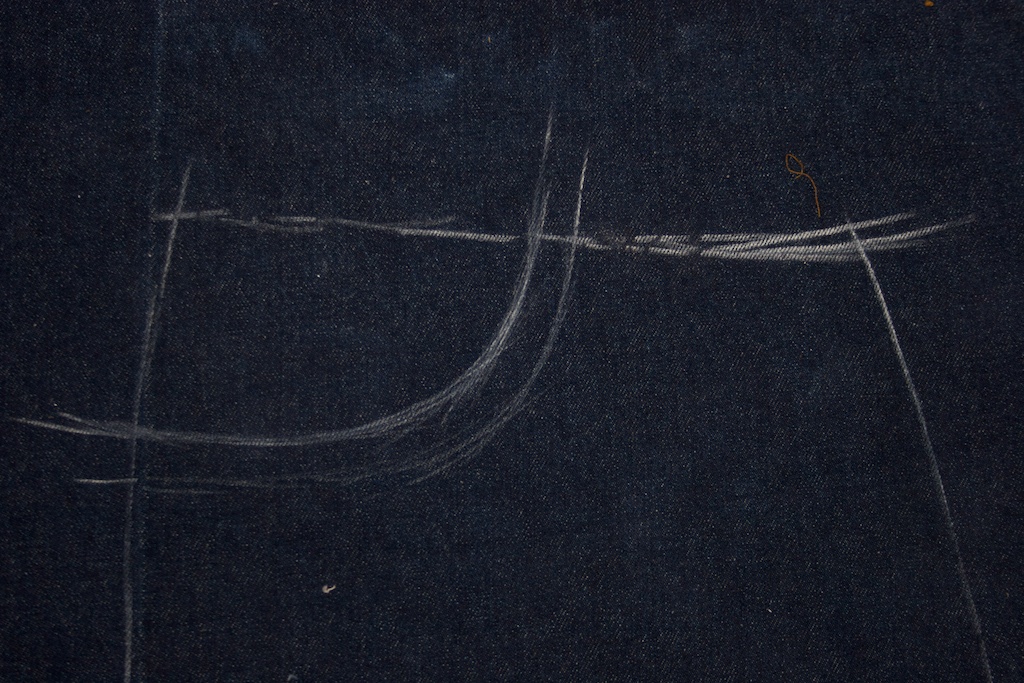
Here I cut out the waistband. Make it a bit longer than the sample, I had to sew on a little piece, since I made it to short:
After the cutting we start sewing.
Sewing denim – the thread creates loops, the needle breaks …
But before we start on the jeans itself we have to figure out the correct tension of the upper thread. Especially if we sew through more than one layer of denim fabric. It took me days to figure out why my machine created huge loops of thread on the underside of the garment – it was to little tension on the upper thread and a misrouted yarn that was not really snug in the tension spanner.
Also I strongly recommend to buy sewing needles from an high quality supplier. I first tried no name needles and had big problems with ripped threads – although I used jeans yarn made by SABA Amann and Gütermann.
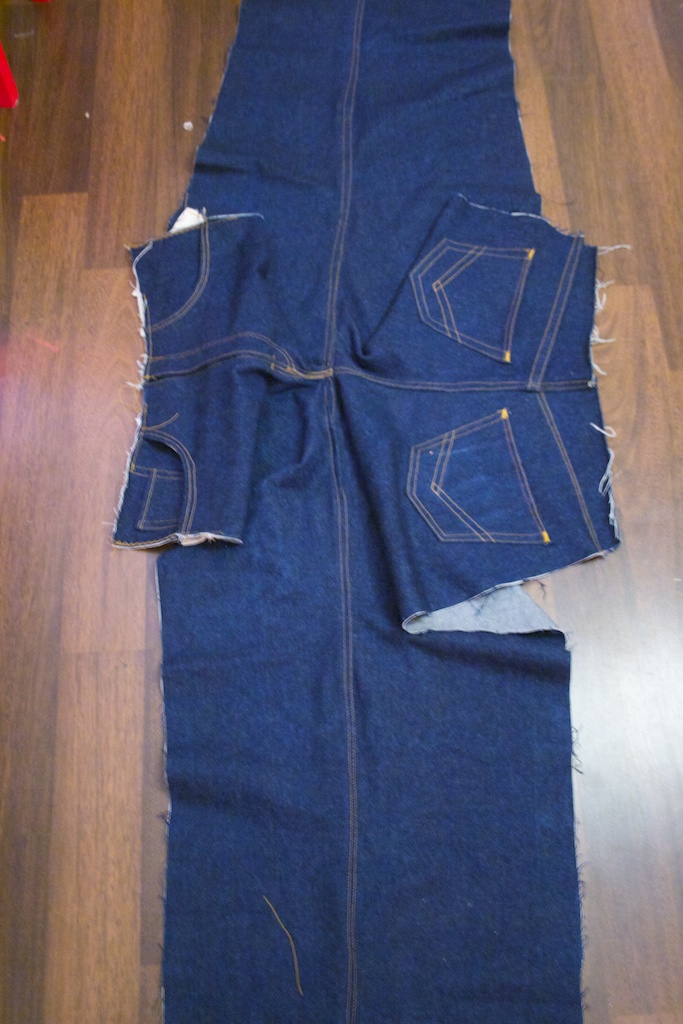
Sewing the back of the Jeans
Now we really start the sewing. It begins with the back side of the jeans, which consists of (top to bottom):
- Waistband
- Shield (the small part above the pockets)
- Leg (here the back pockets are attached to)
The lap felled Seam is what makes a Jeans look like a Jeans
The first step is to sew the shield on the leg. Since jeans are workers trousers the seams have to be sturdy. One of the sturdiest seams is the lap felled seam, it makes the seam more resistant than the fabric itself.
It takes three seams to make a complete lap felled seam, of these seams only two are visible.
Modern synthetic yarns might render the lap felled seam needless but for me it was important to keep the jeans‘ original character. Denim brands mostly stick to the flat felled seam but for example H&M does not sew the inseam – the seam that connects the legs in the inside – as a lap felled seam anymore on most of their jeans.
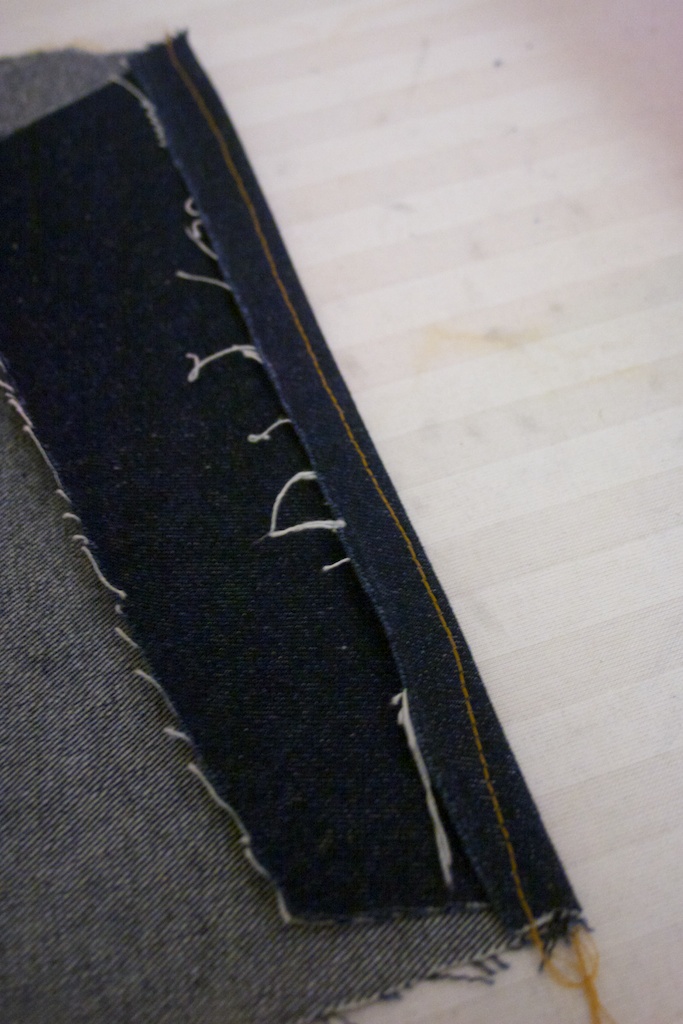
Here we go, we let the two pieces just overlap a bit and sew them together with a straight stitch (this stitch will be hidden later on):
Now it gets folded once (the fabric is flipped also):
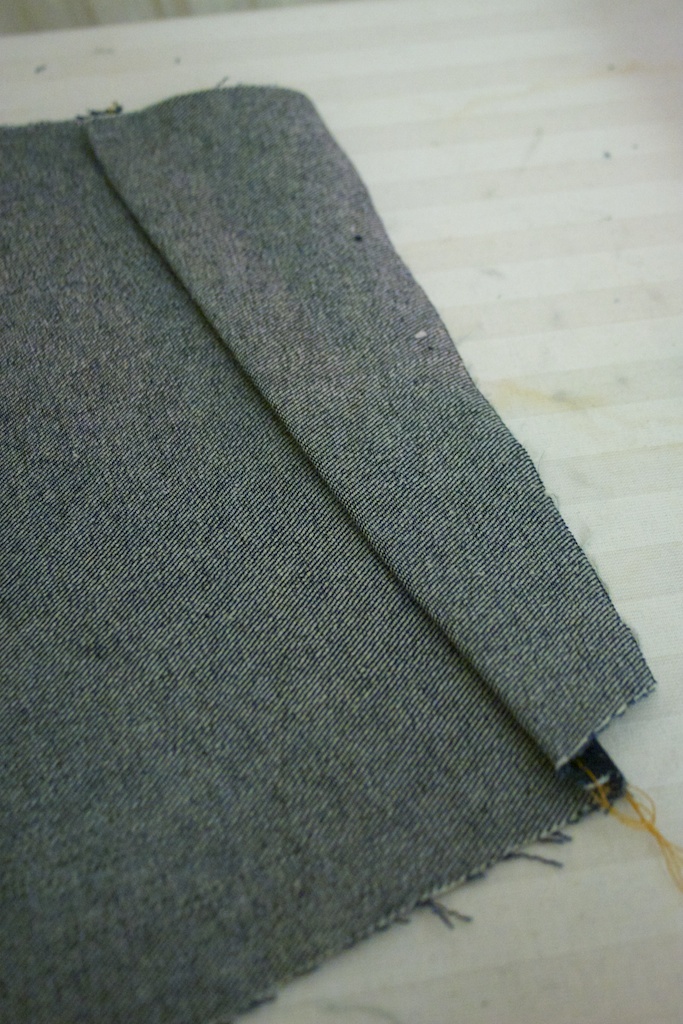
Now we fold the upper part again. The fabric now forms a Z (inverted):
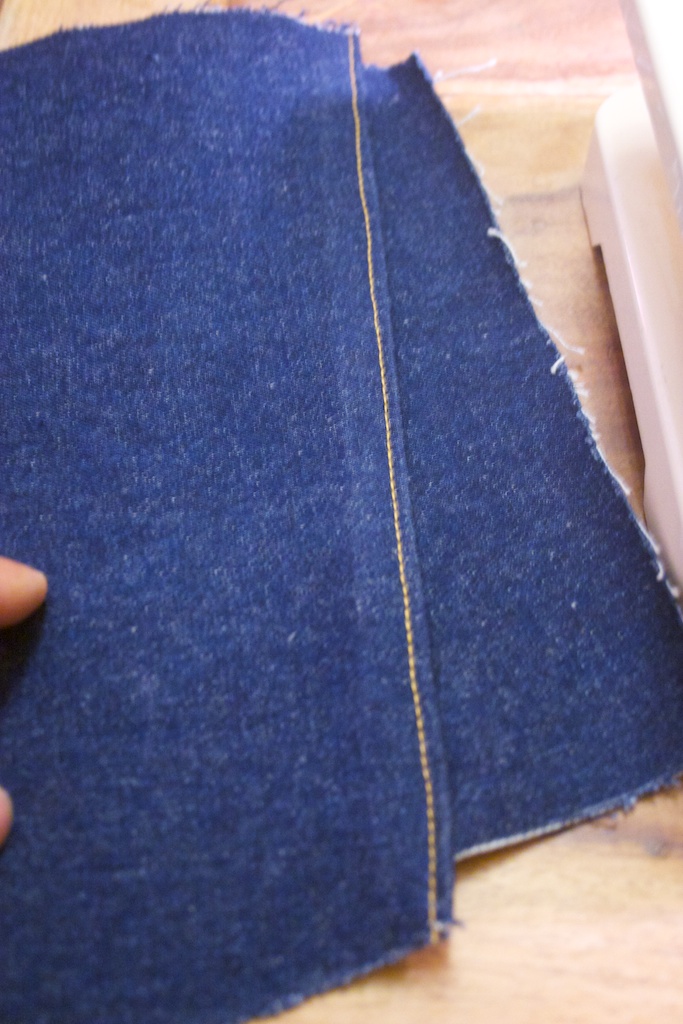
Now everything gets sewn together. First one seam:
And then a second:
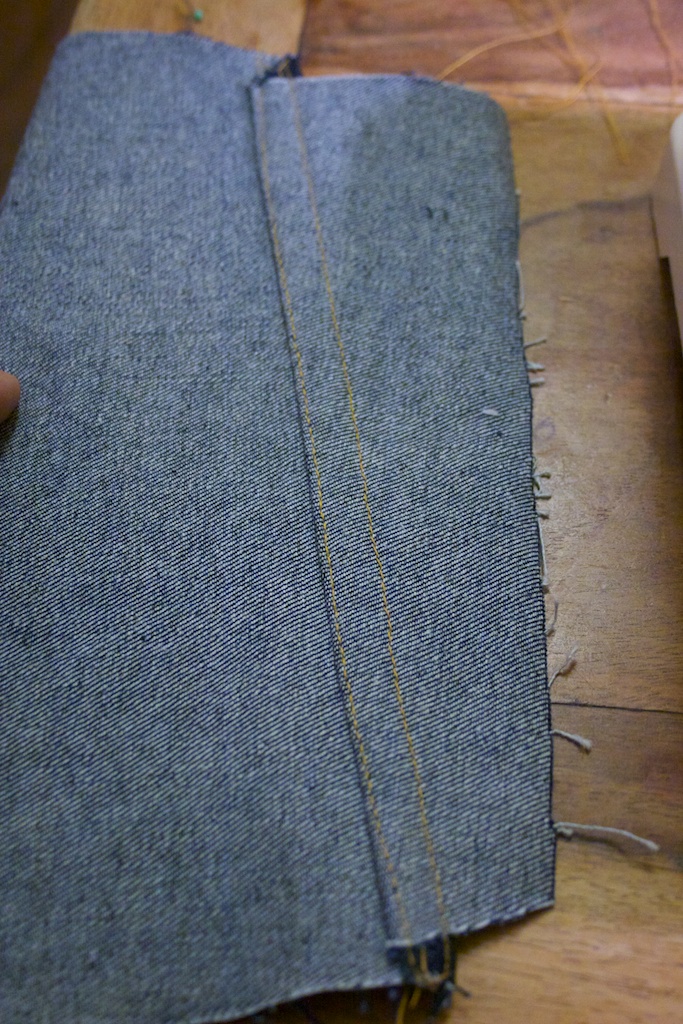 As you can see, it really is a challenge for your equipment and your skills to sew through four layers of fabric. But we will take it to a higher level in the next step.
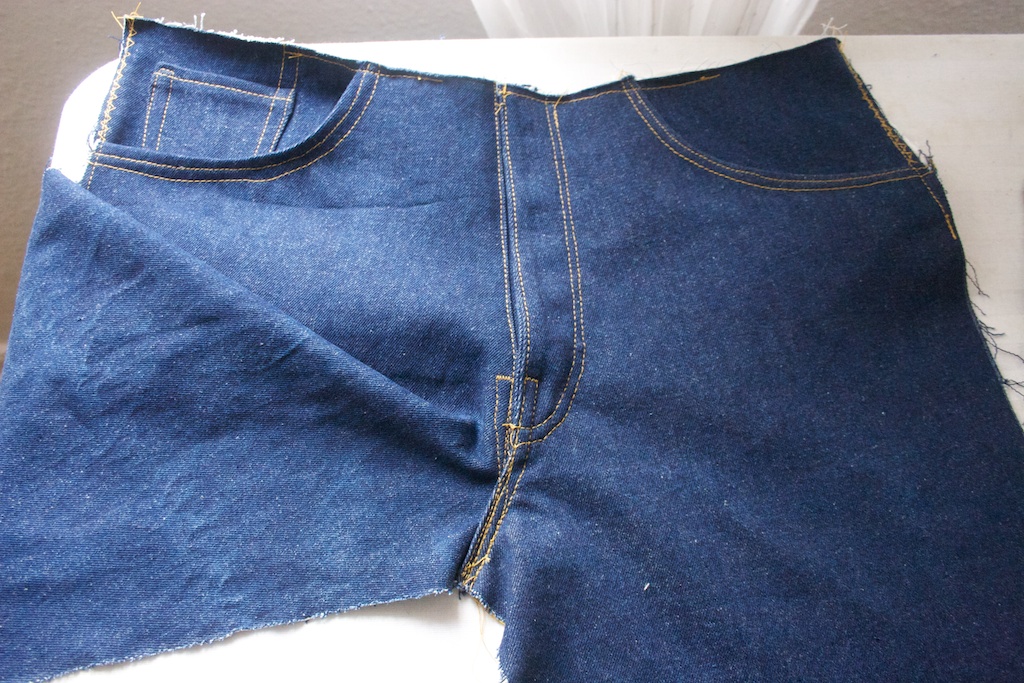
Now we connect the left and right half of the jeans – again forming a lap felled seam:
At the „crossroad“ of the two lap felled seams you have to sew through eight layers of fabric. I needed to disassemble the sewing feet, other wise the fabric would not have fitted under the needle.
But if you master this part there is not bigger challenge to come for the rest of your jeans.
So you can pat yourself on the back that you got so far. And you can see, that the seams I sew are not that parallel at all – but hey, this is the first garment I am sewing – ever.
Backpocket
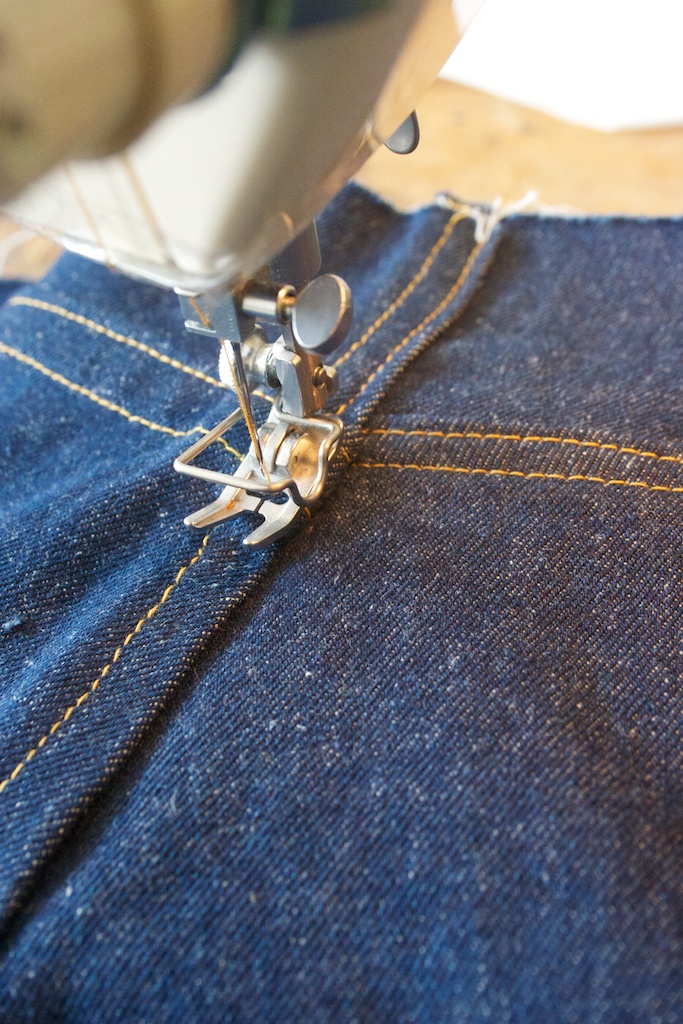
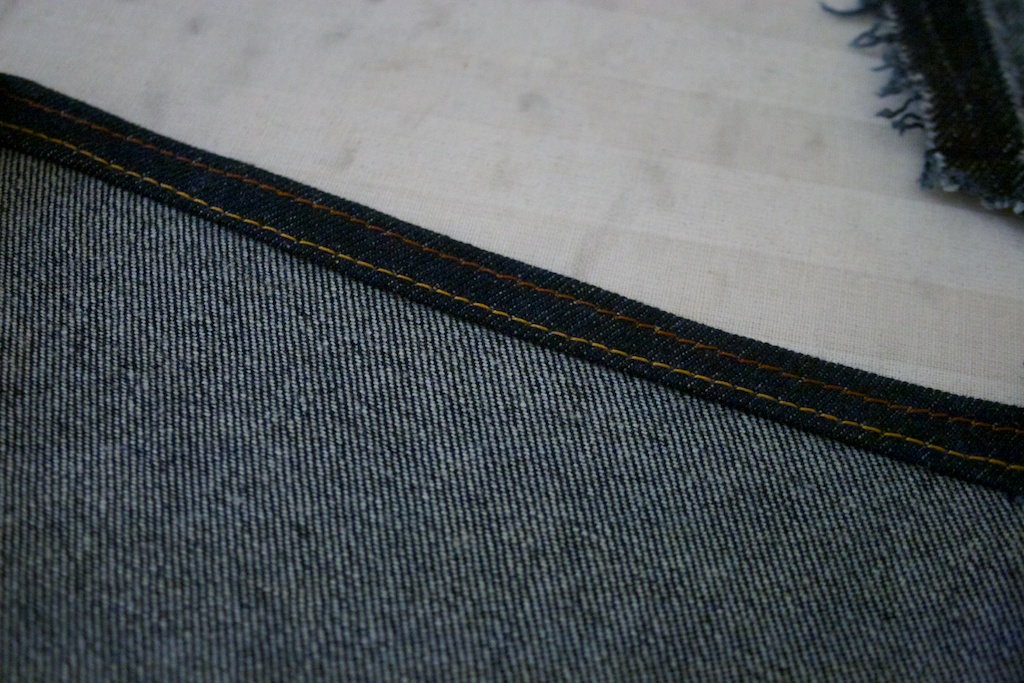
Now we prepare the back pockets. Therefore we fold the upper edge twice and sew it with two parallel seams:
Now the other edges are folded inside and ironed:
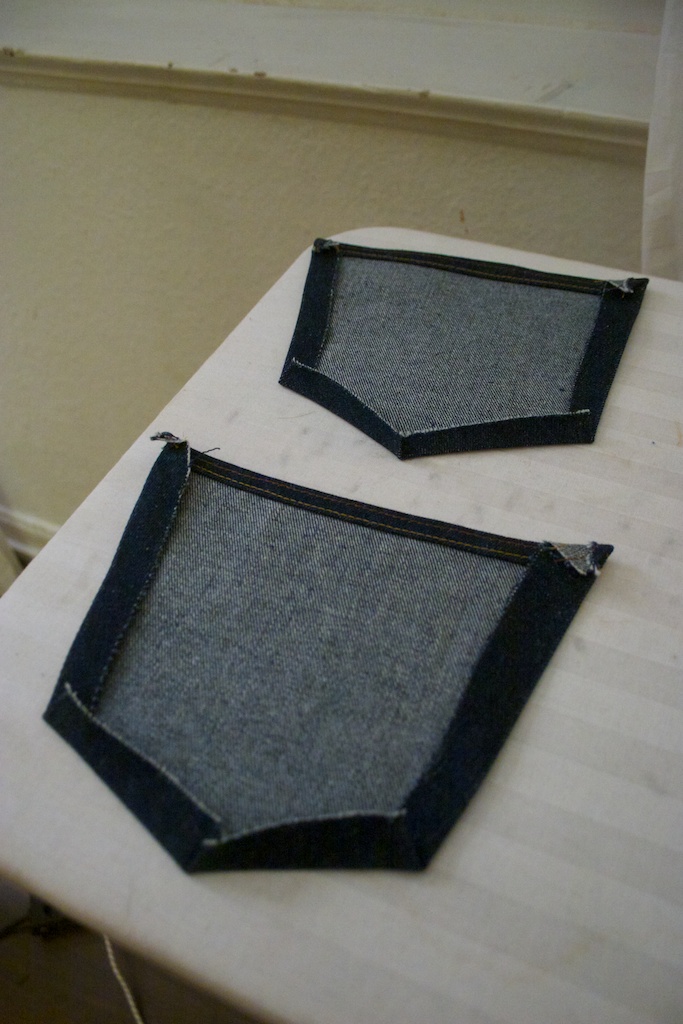
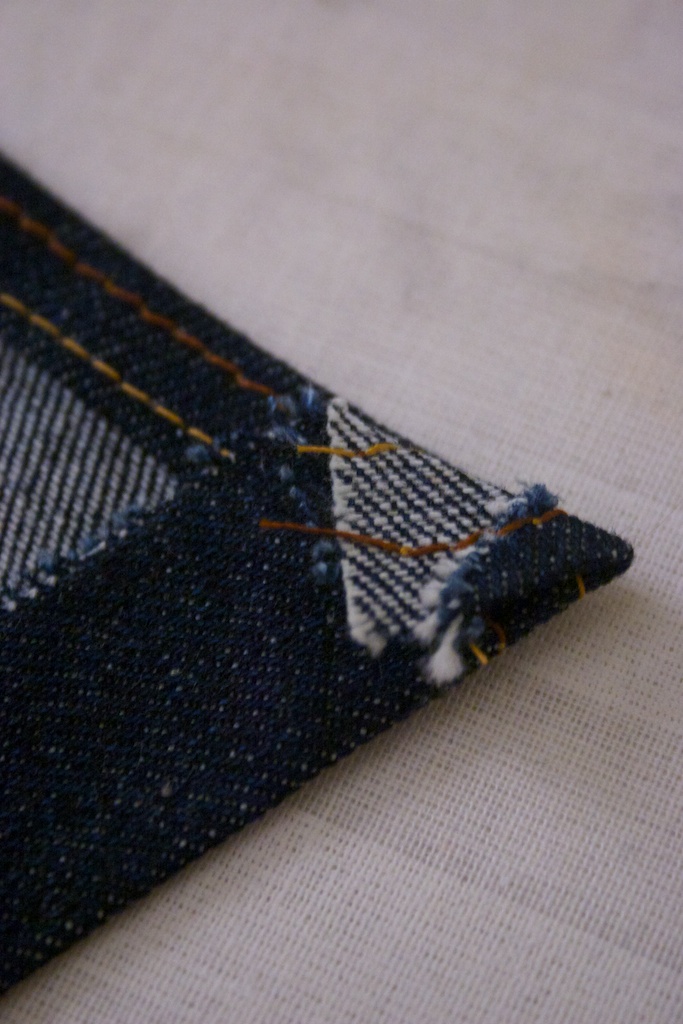
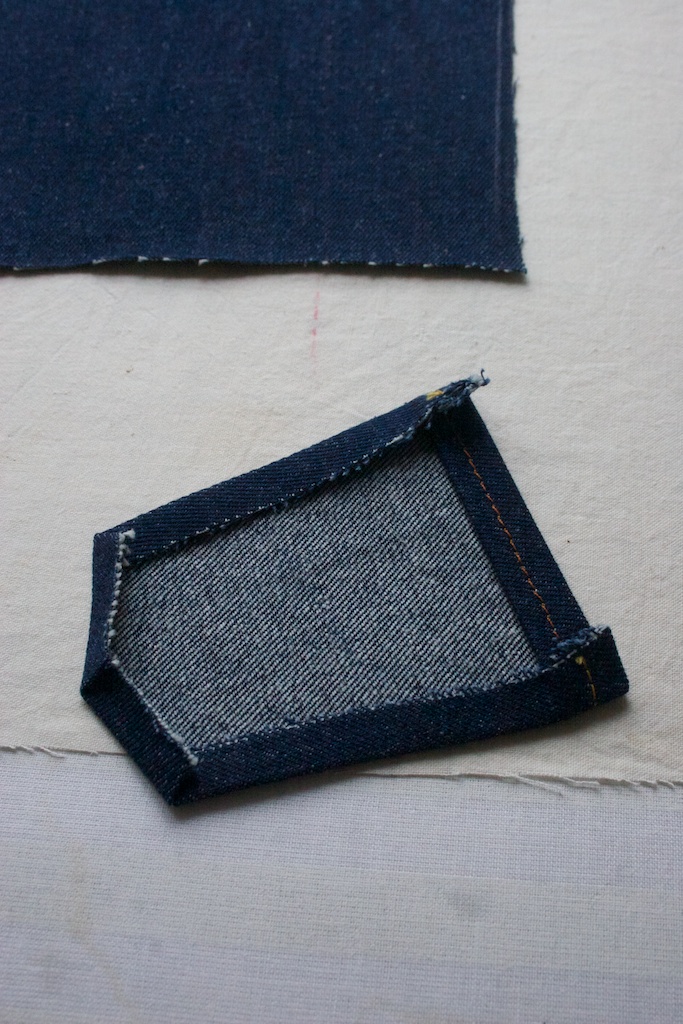
The upper corners have to be folded inside:
I also added some topstitching as a decorative element.
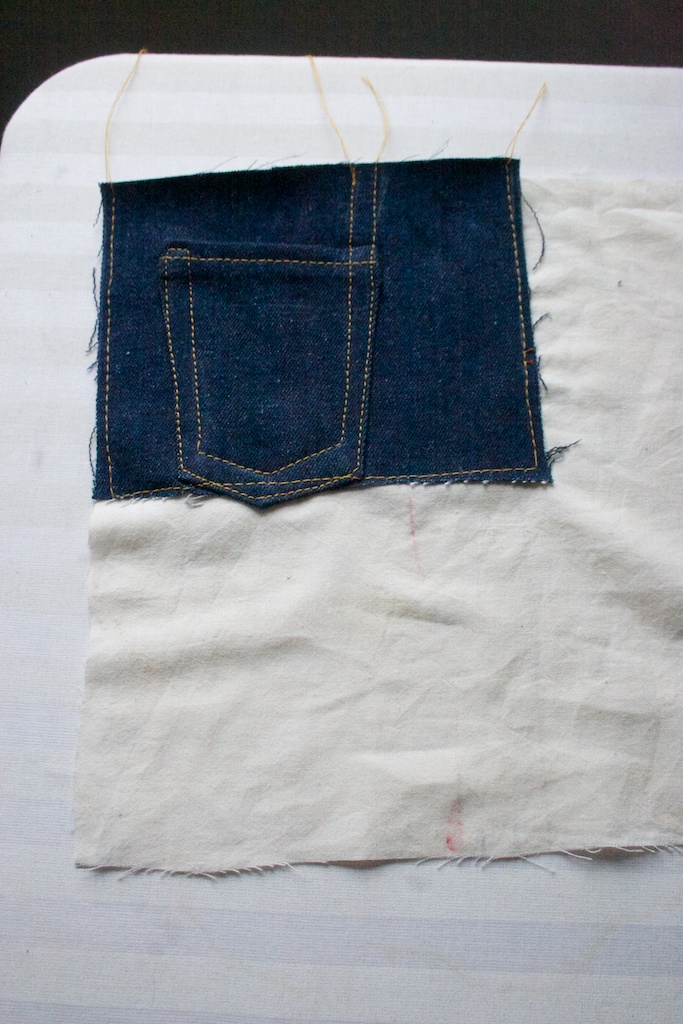
Now we attach the pockets with pins.
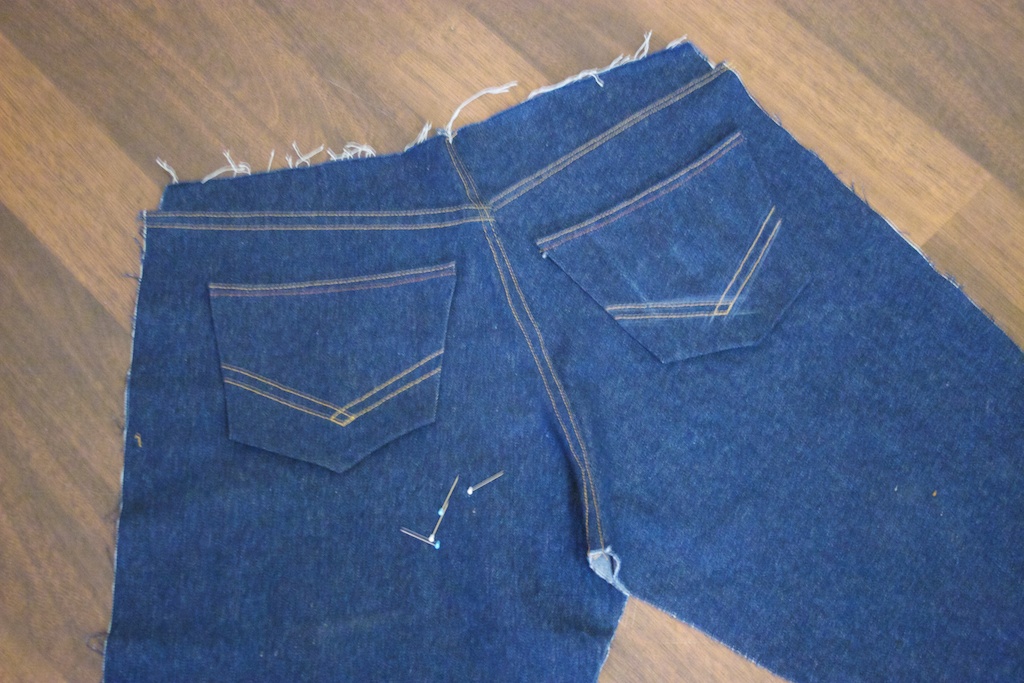
And sewing:

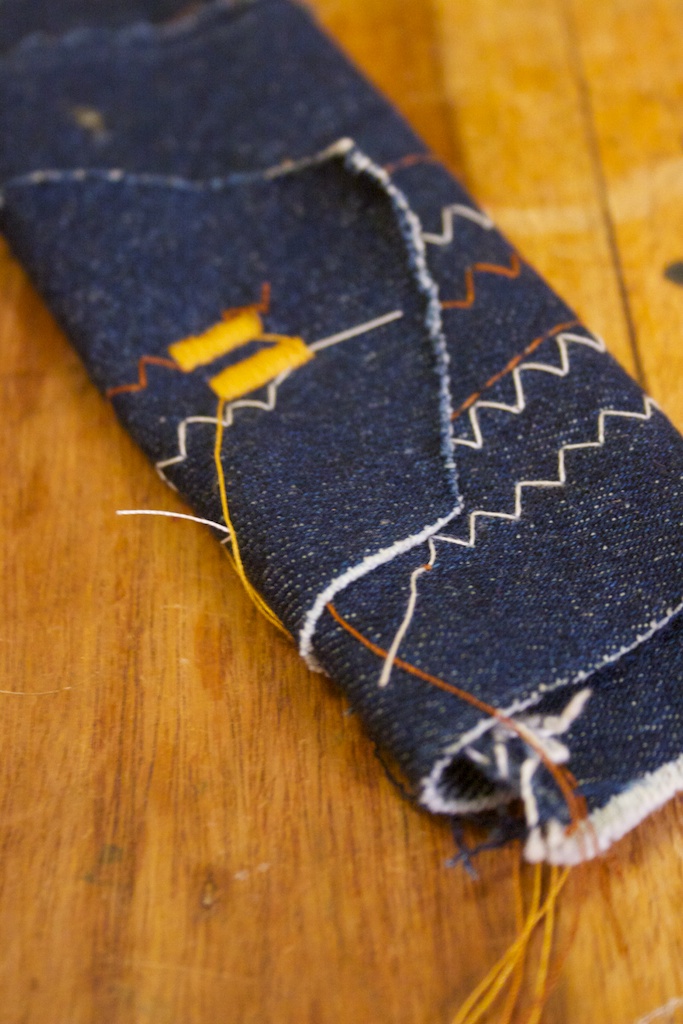
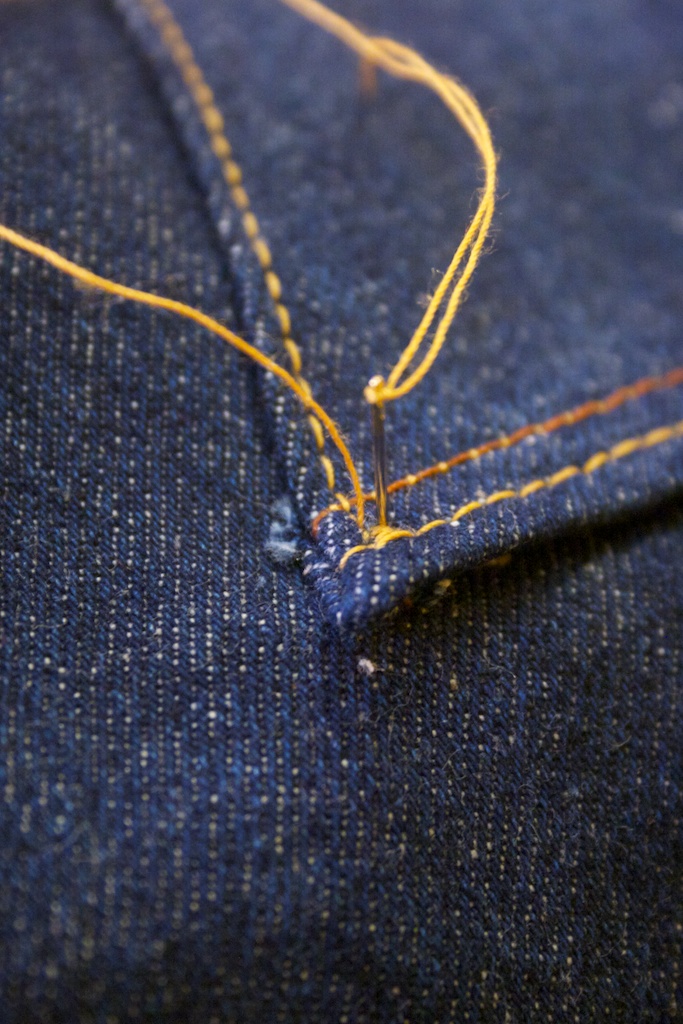
The end of the thread
I sutured the end of the thread by hand:
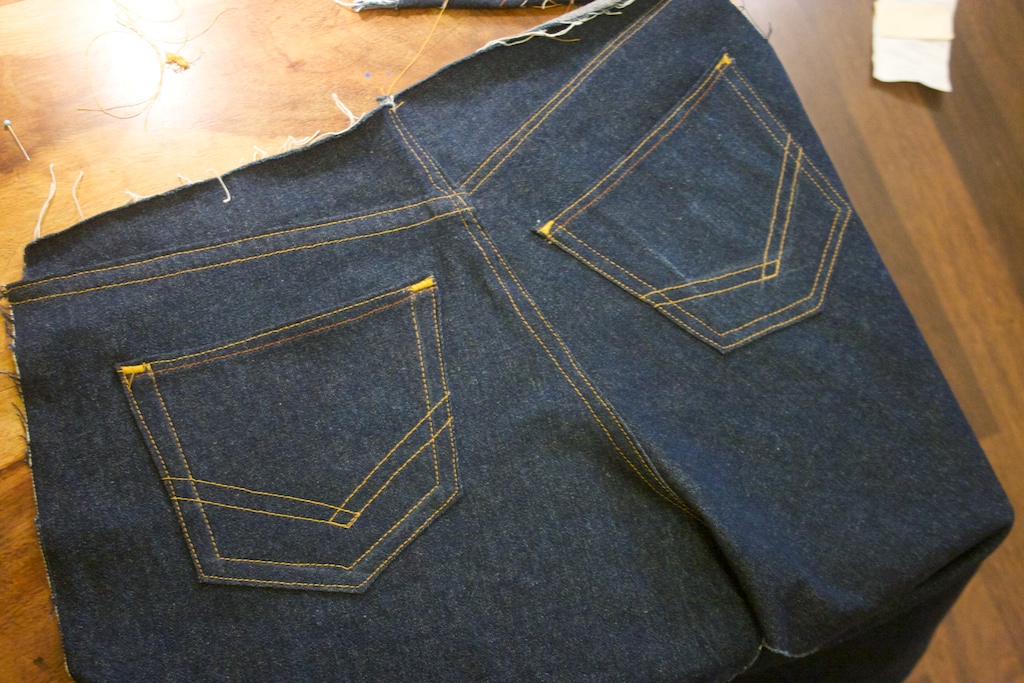
You also add a tight zig zag stitch to make the pockets durable:

The back of the pants is finished:
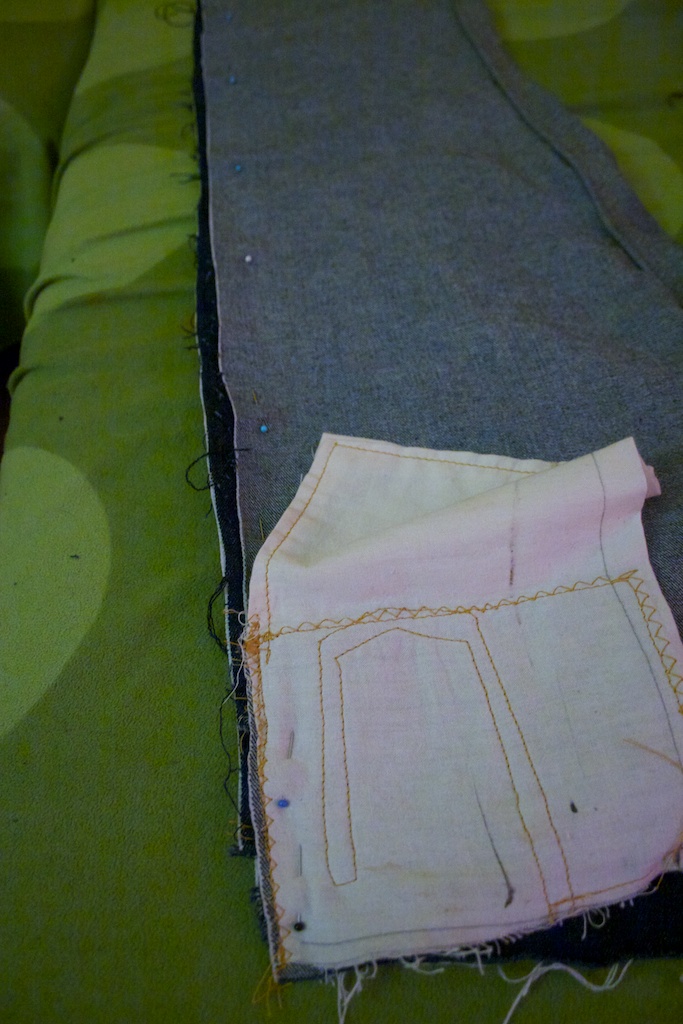
Front Pockets
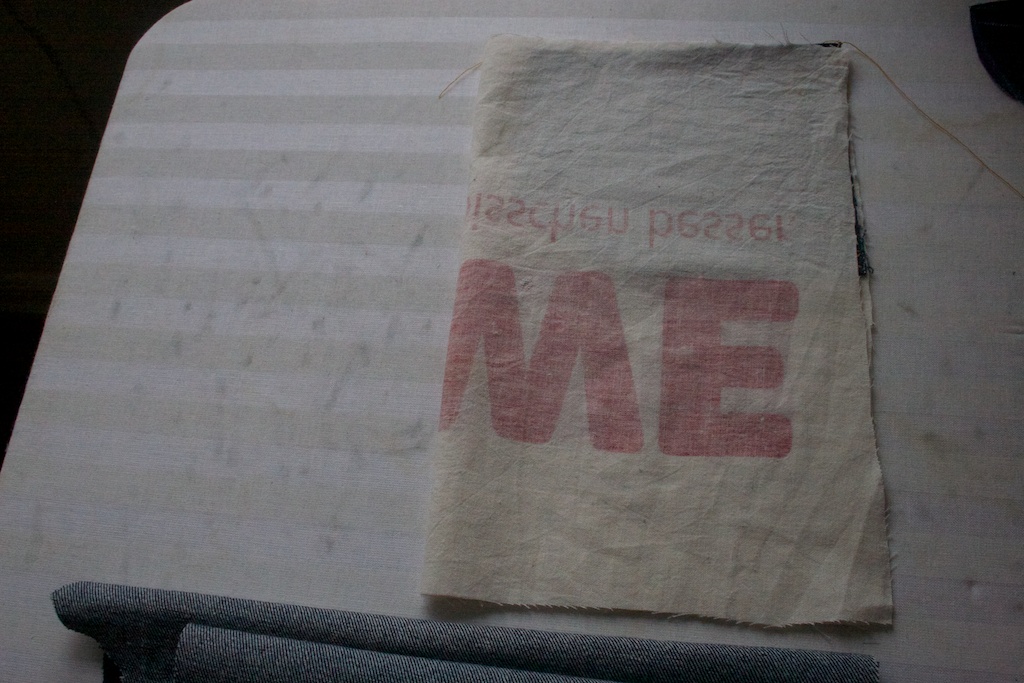
The front pockets are much more difficult to create. The inner lining is made of a thinner cotton canvas. I took a used shopping bag because I liked the used look that it gives through the logo printed on it. But I would not advice to do it that way, since the fabric already tore in one of my pockets.
 Preparing the right front pocket.
The small coin pocket is just a smaller version of the back pockets.
Sewing the coin pocket on top of the shield:
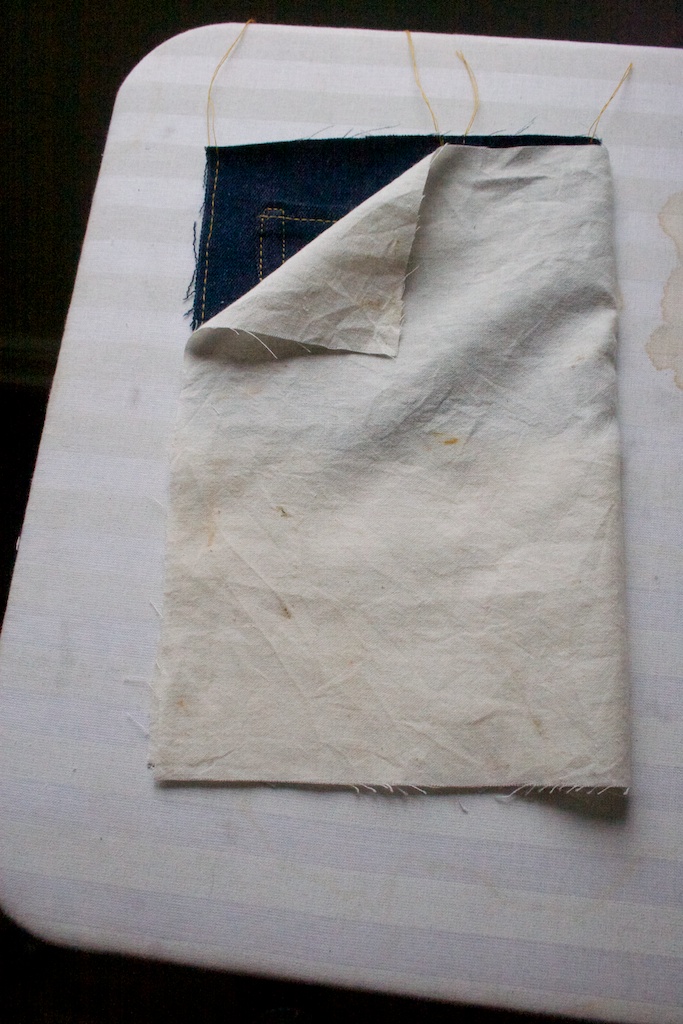
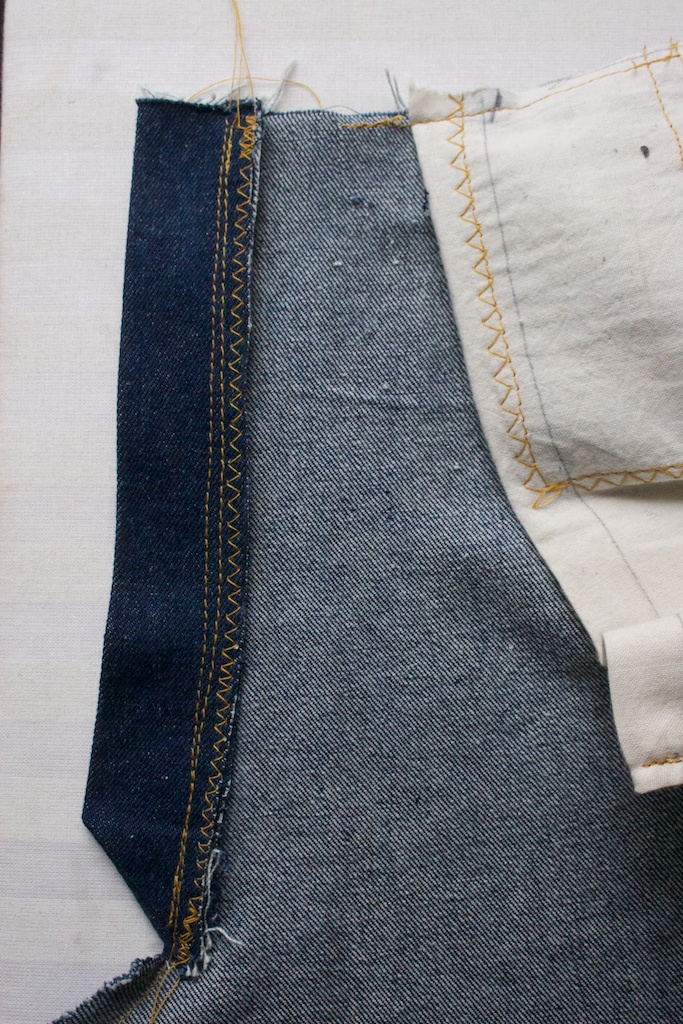
This is, how it will be inside the jeans:
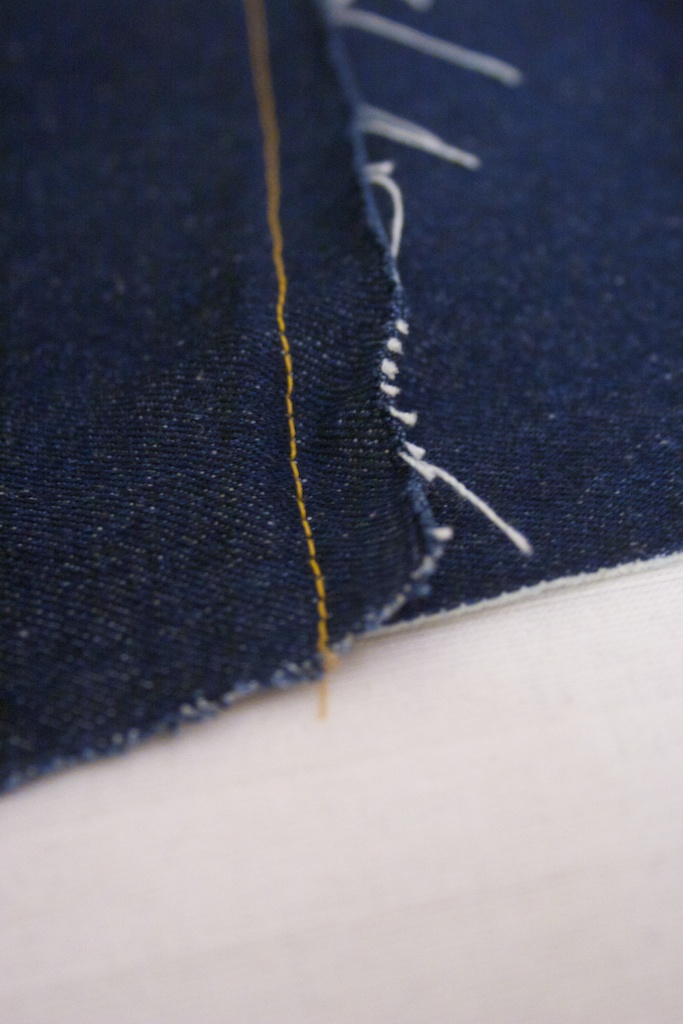
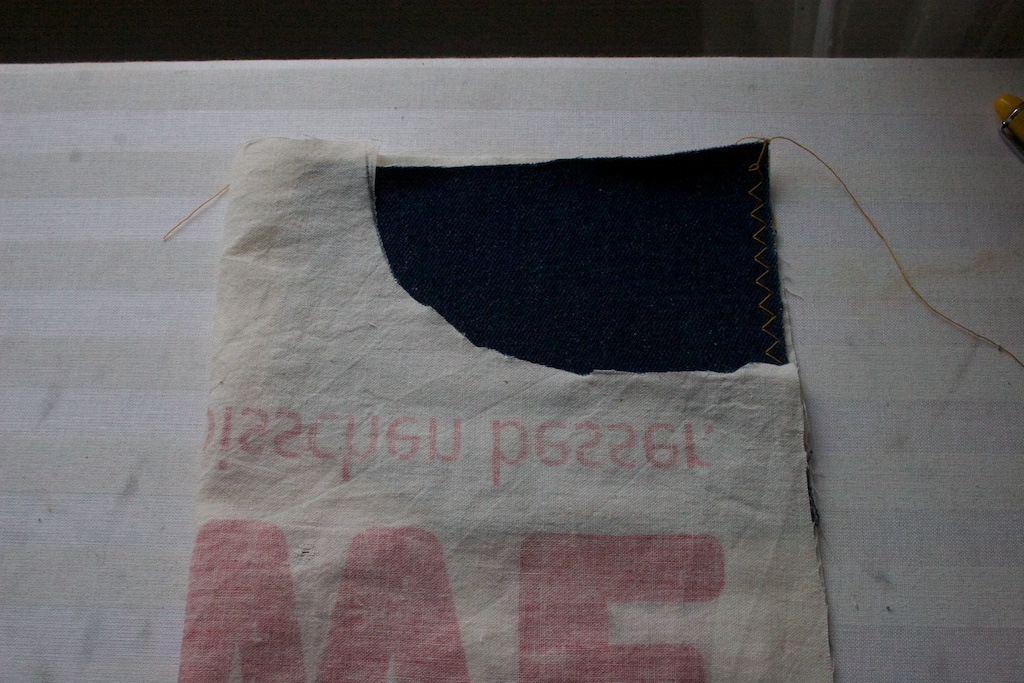
On the left side I added a zig zag stitch to prevent fraying, I also cut off one corner:
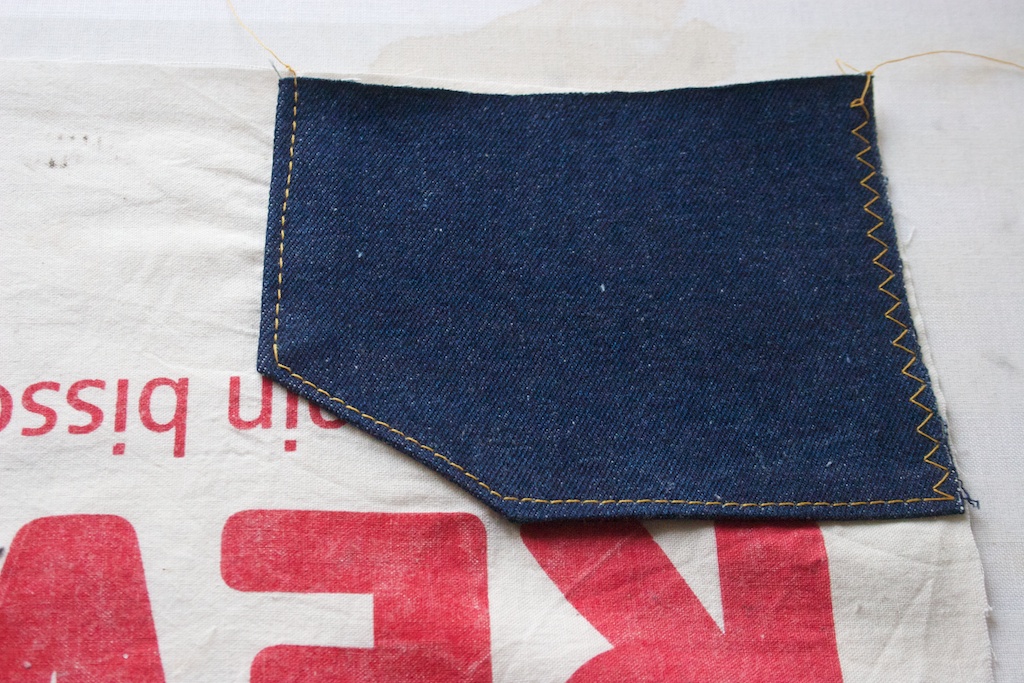
Closing the pocket:
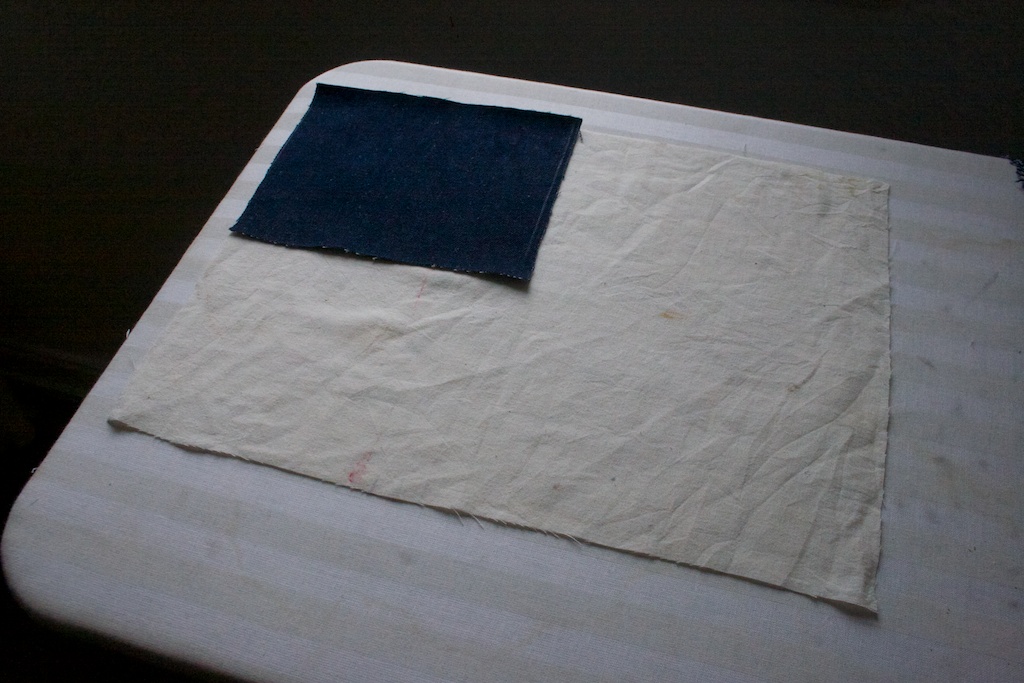
Lay the front leg on top:

trace the pocket:
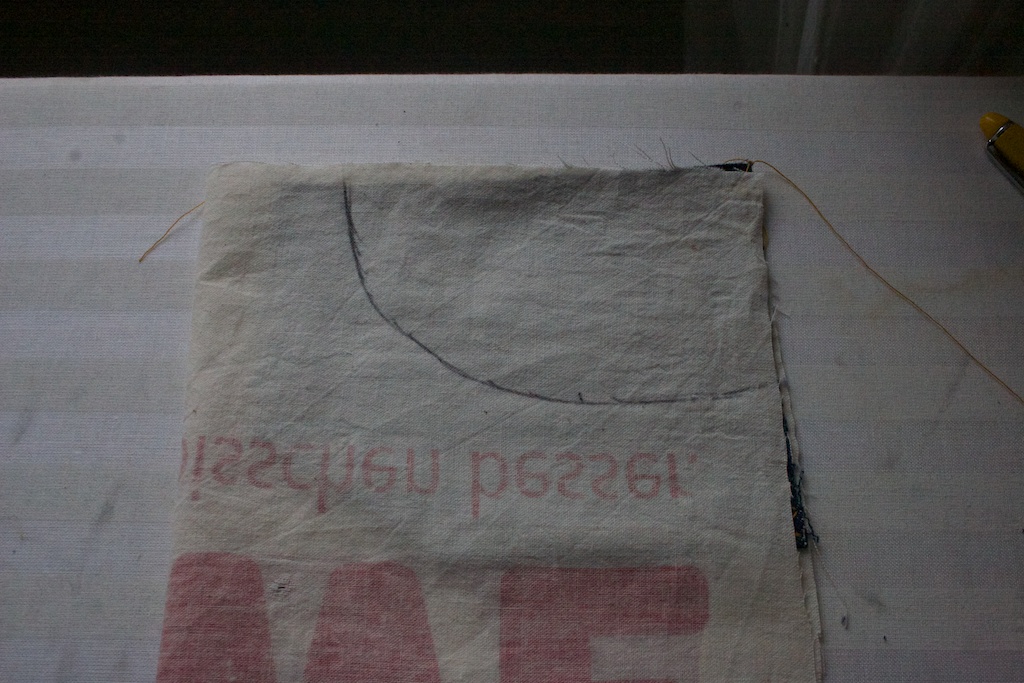
Cut it off:
Fold the seam allowance and iron it:
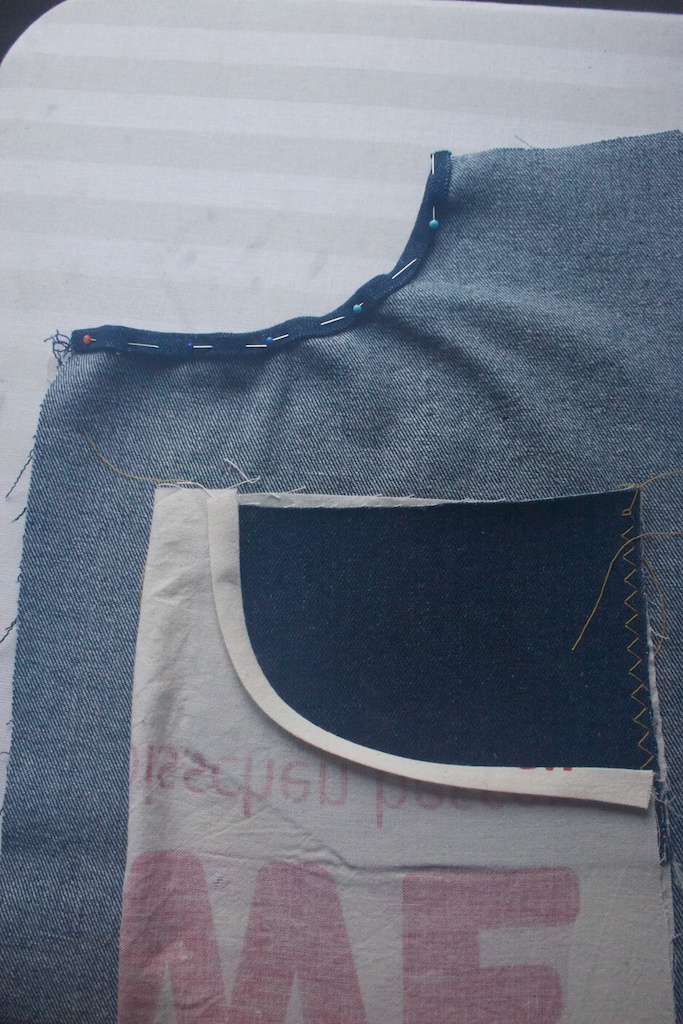
Stick them together using pins:
This is how it will be attached later on:

Now the pocket will be closed:

We add a seam on top:

This was really complicated so far. Congratulations if you mastered this step!
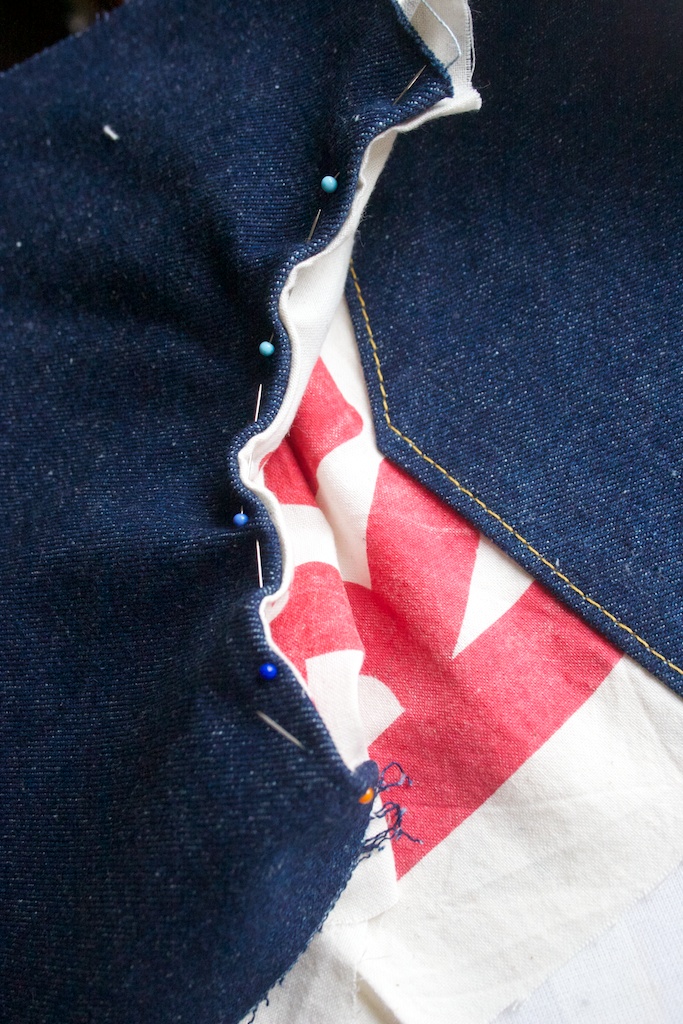
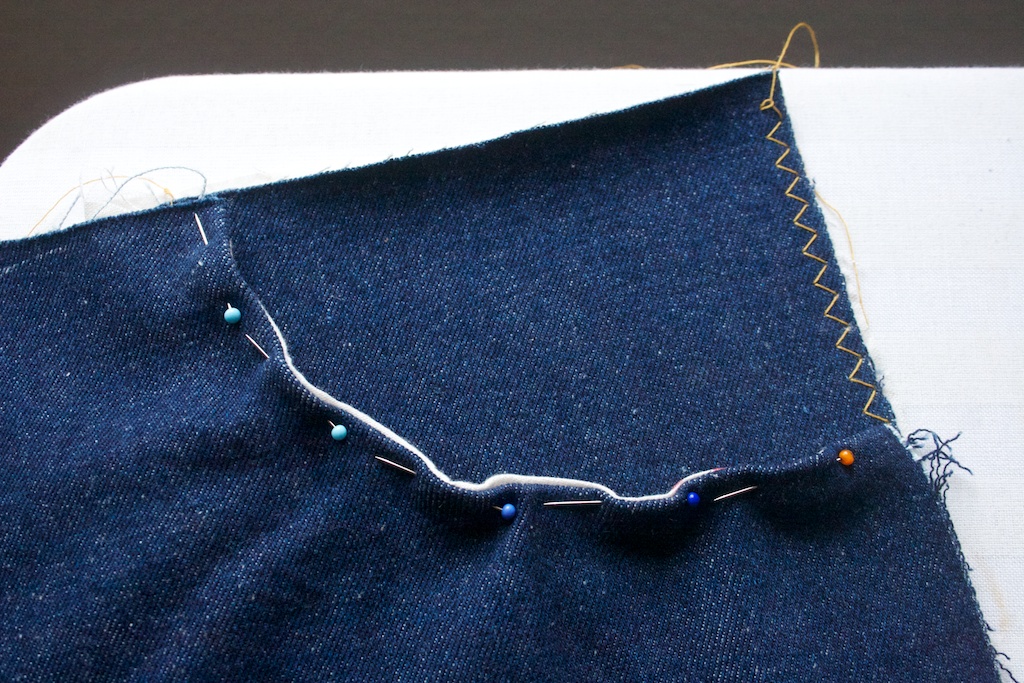
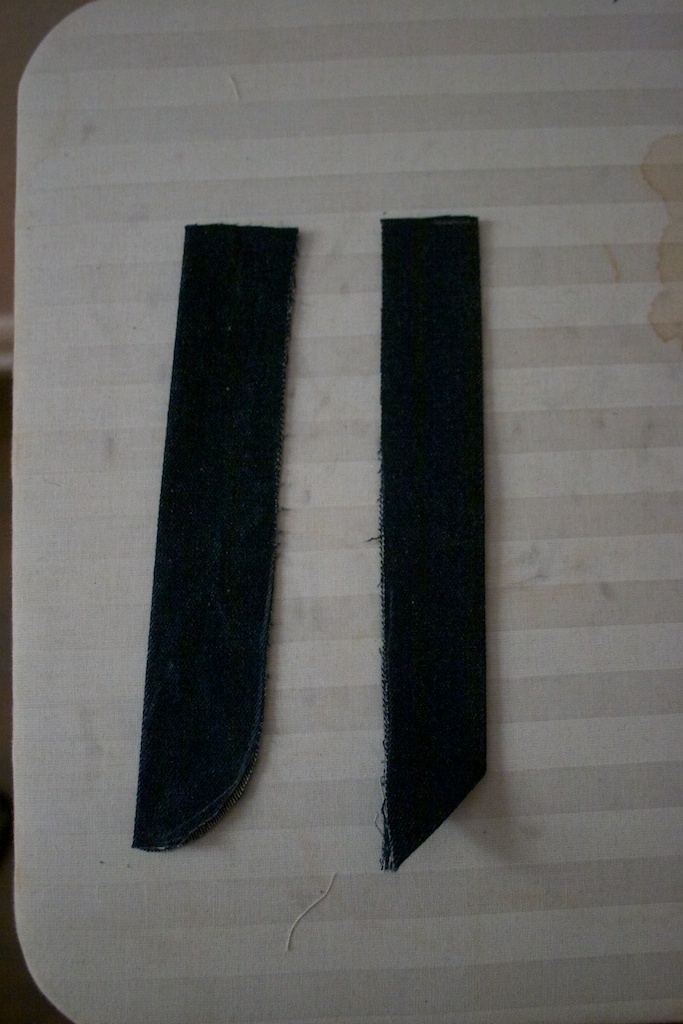
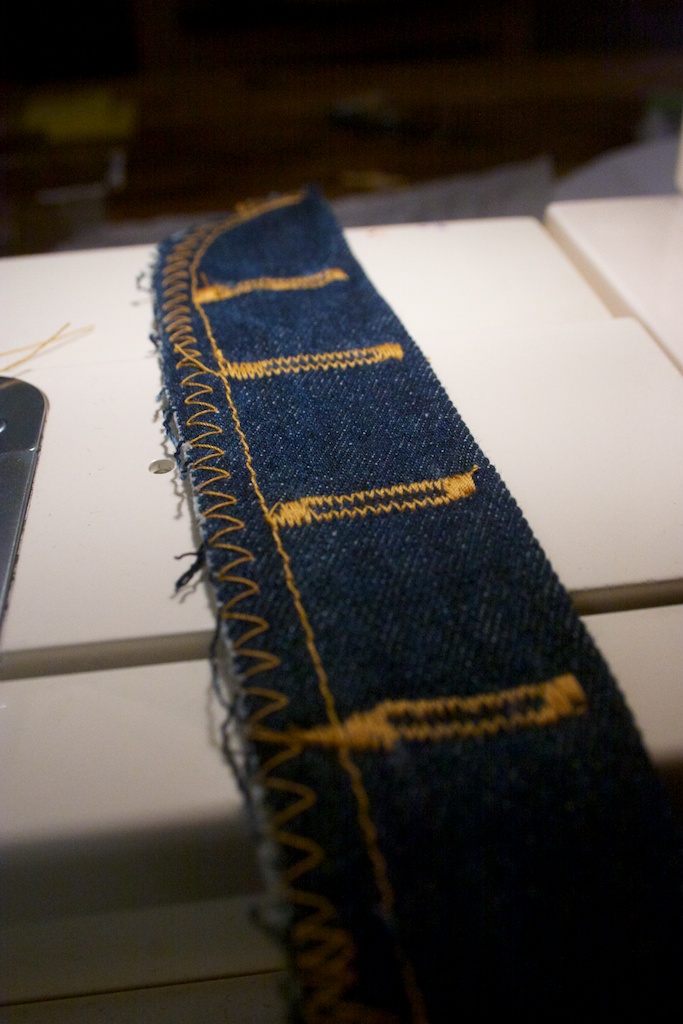
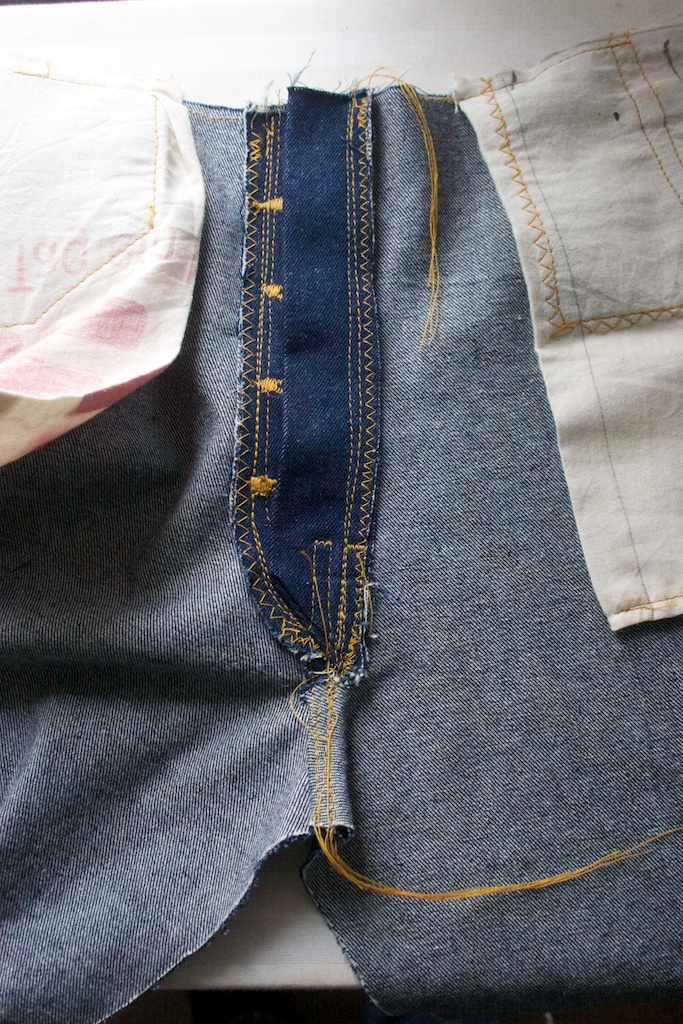
Now we keep it complicated and add the fly. Into the left part with the rounded edge we will cut the buttonholes later on. The right one will hold the buttons.
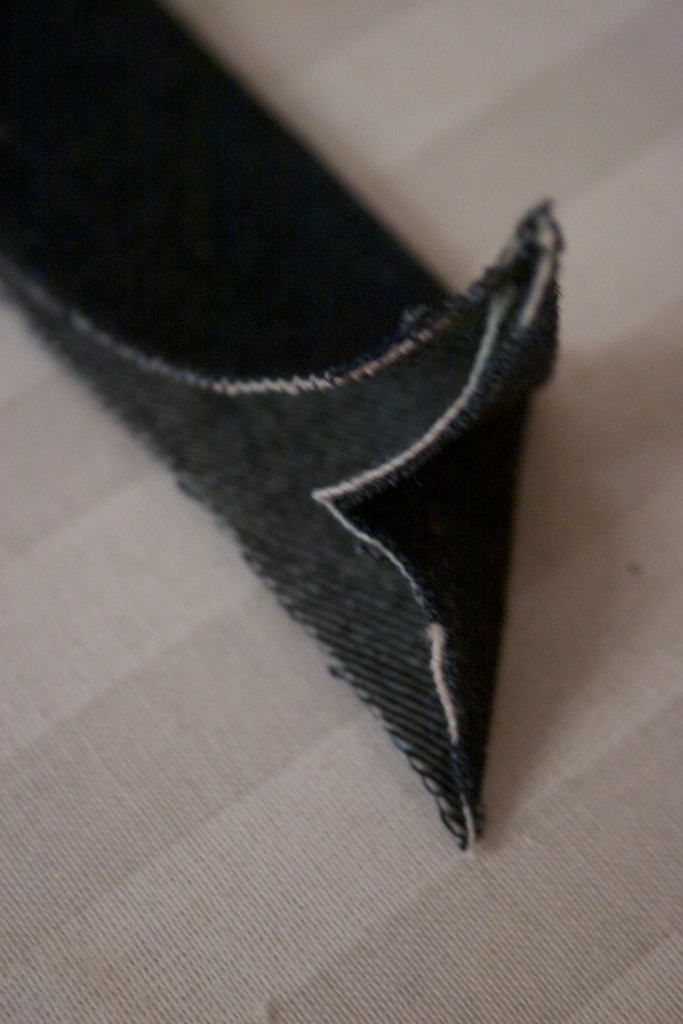
This is how it is folded:
Sewing the buttonholes and a zigzag to prevent fraying:
We prepare the left leg. Therefore fold the edge under twice and iron it:
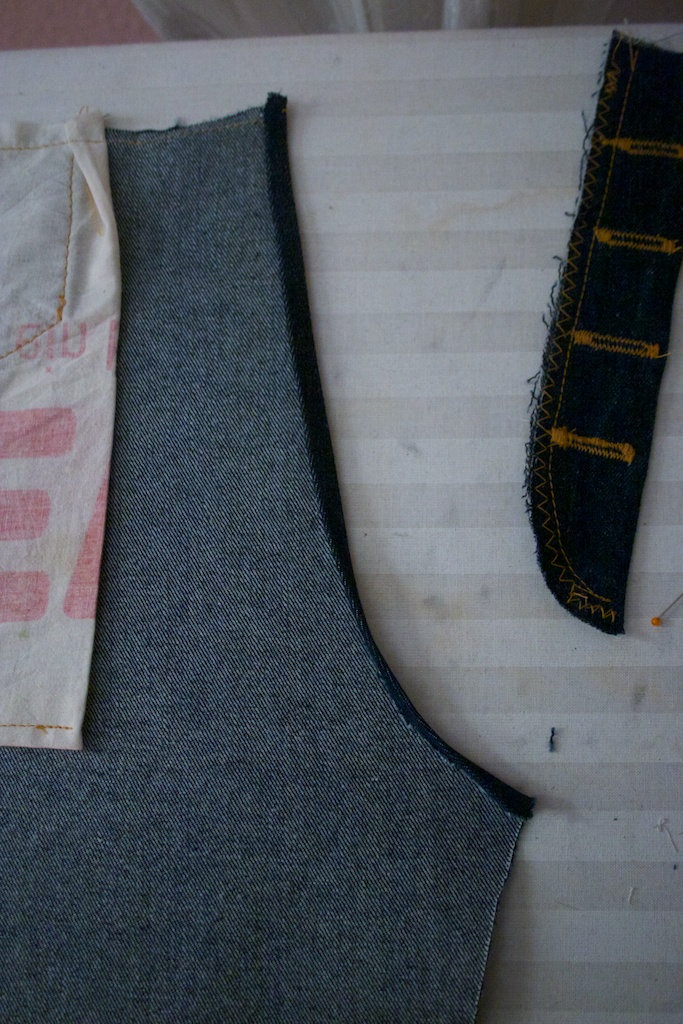
Lay the fly on it and make a mark at the lower end: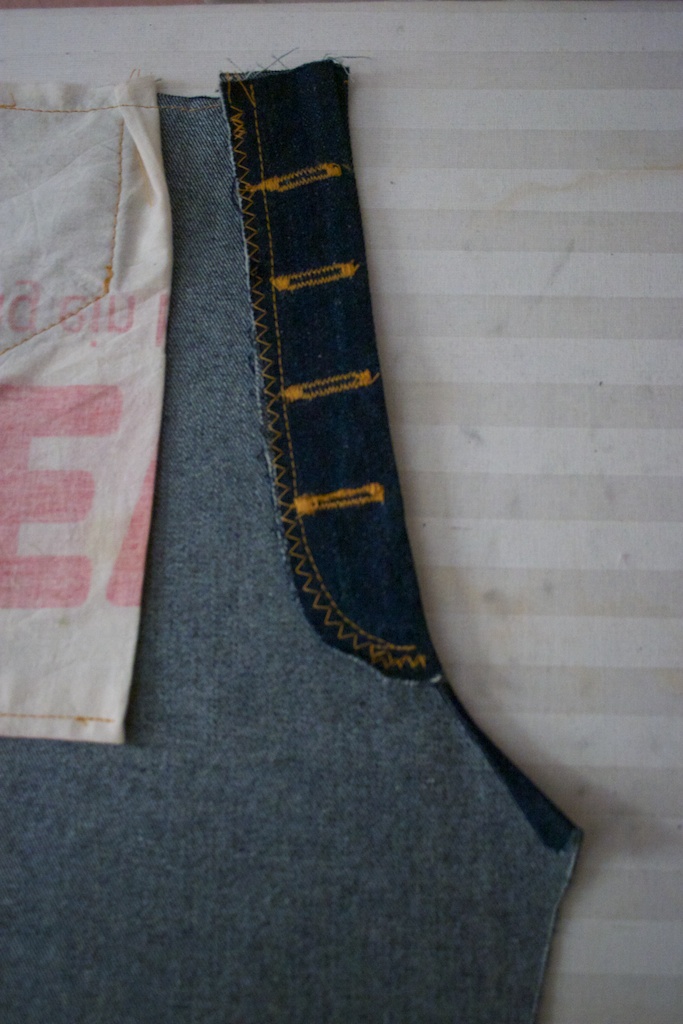
Now cut into the seam allowance just where you marked it: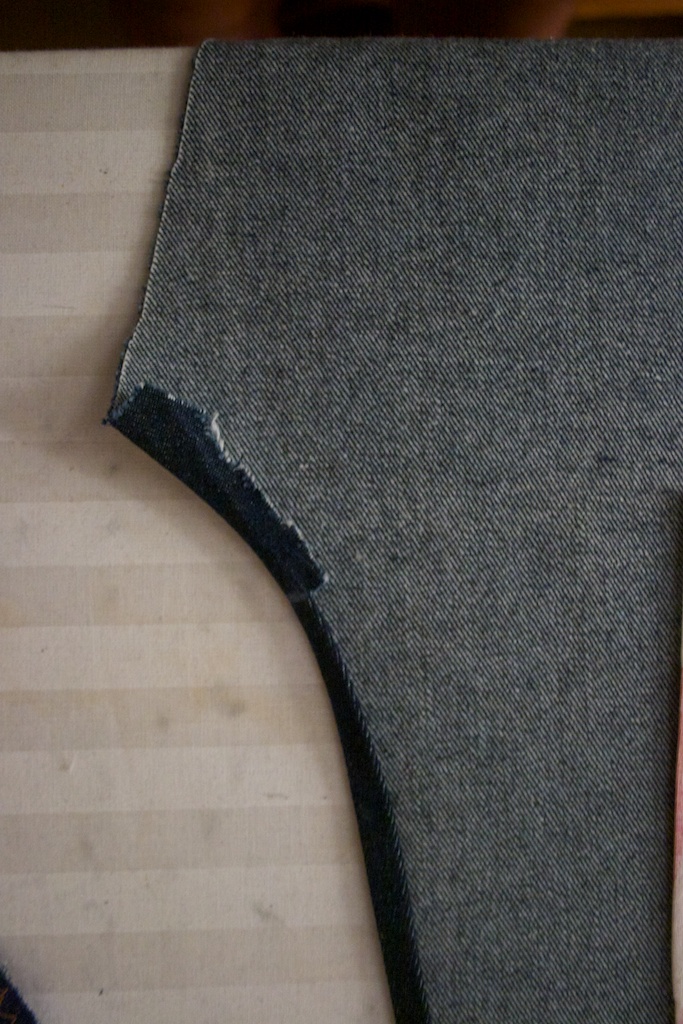
Now we sew all of the seam allowance: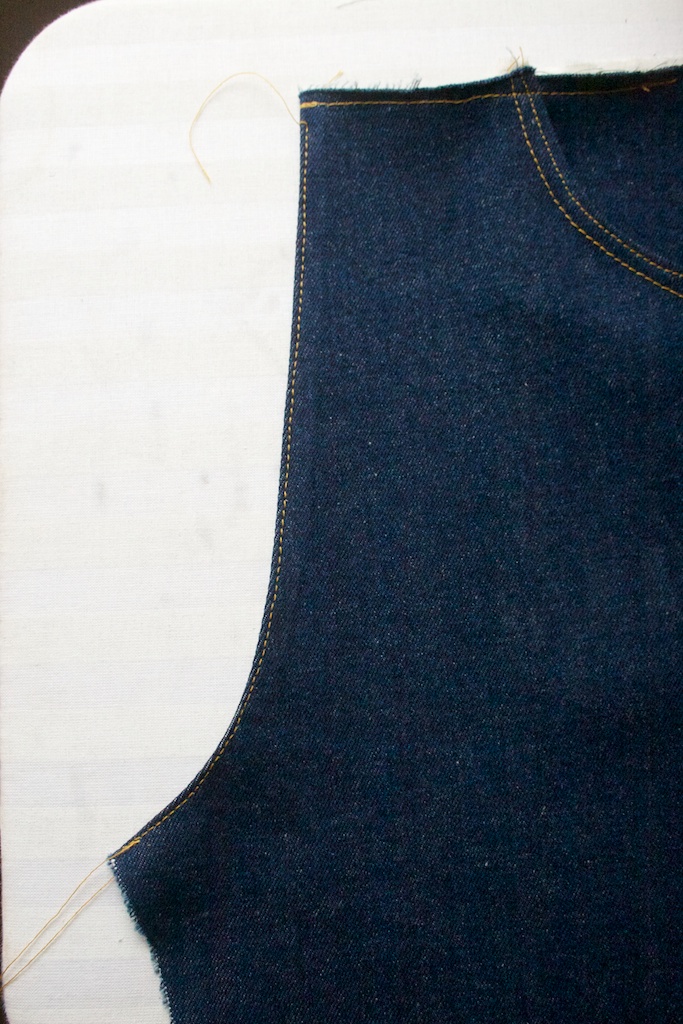
Than we attach the fly:
Sewing the Fly with a parallel seam: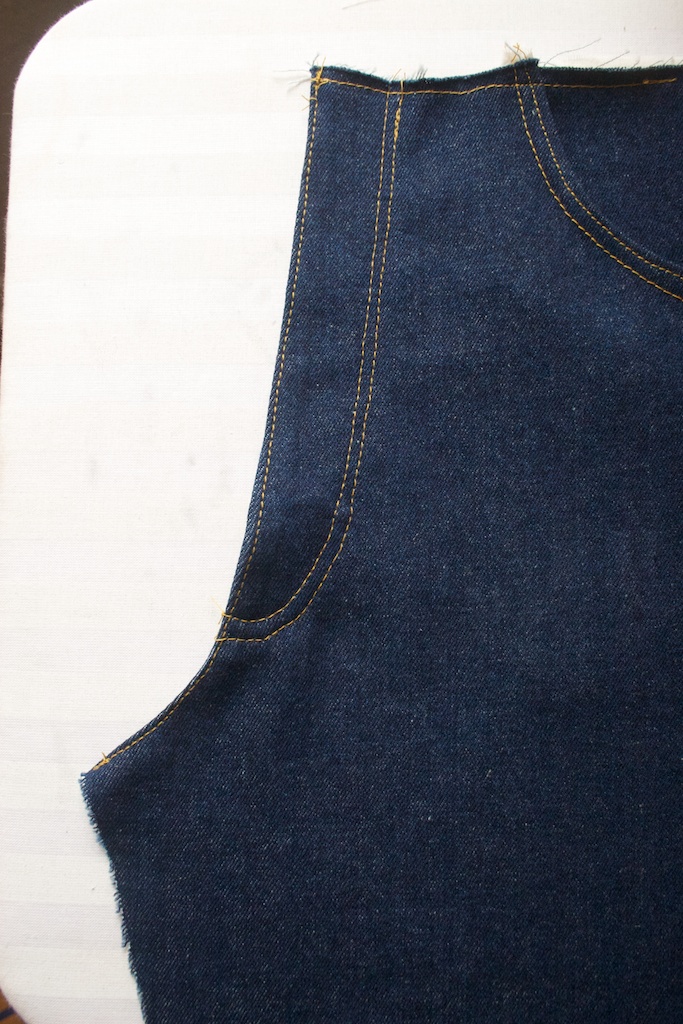 This is the backside. Because of the cut we did before, the seam allowance below the fly can still be used to connect the two halves of the jeans
Now we attach the other part of the fly. Here we also need to cut the leg’s seam allowance.
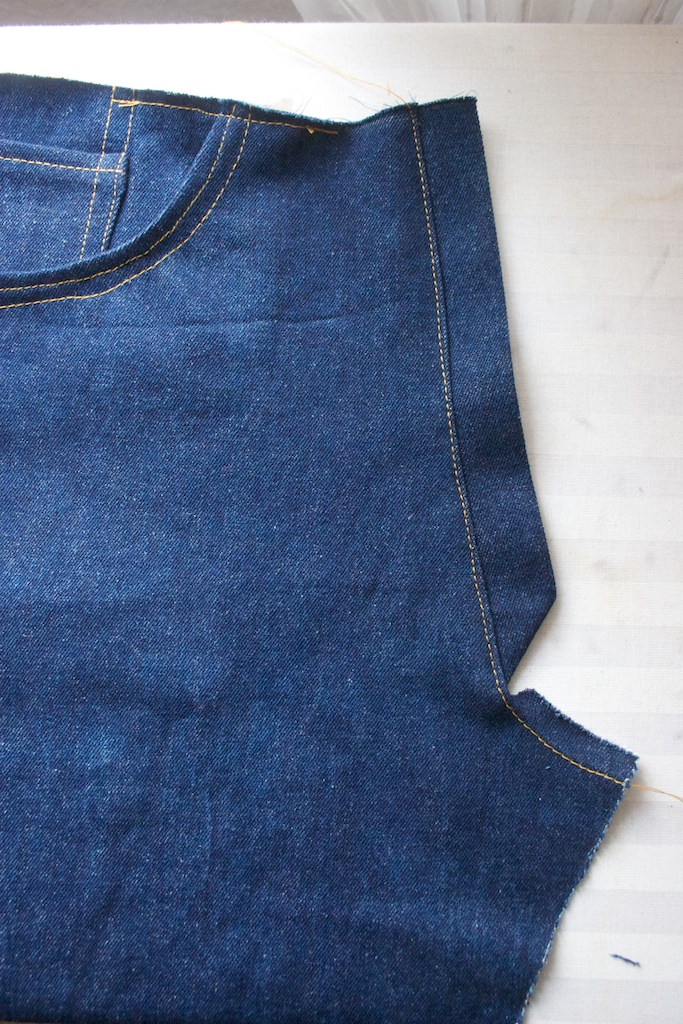
Again – add a zig zag to prevent frying:
And now we connect the two front legs, also utilizing a lap felled seam:
Oups I did a small mistake, but it looks nice I think 🙂
 The left doubble seam was a mistake.
Great, we did a big step further. Now we have to close the legs.
We start with the inseam, which is a lap felled seam again:
If this is done the rest is a breeze:
 Pin the outer edge together and connect it with a single stitch. Add a zigzag on both seam allowances per side.
We add a little seam to protect the pockets from getting ripped:

Great, now you can try it on for the first time!
But we’re not finished yet, the waistband needs to get attached. Therefore we fold, iron and pin the seam allowance …
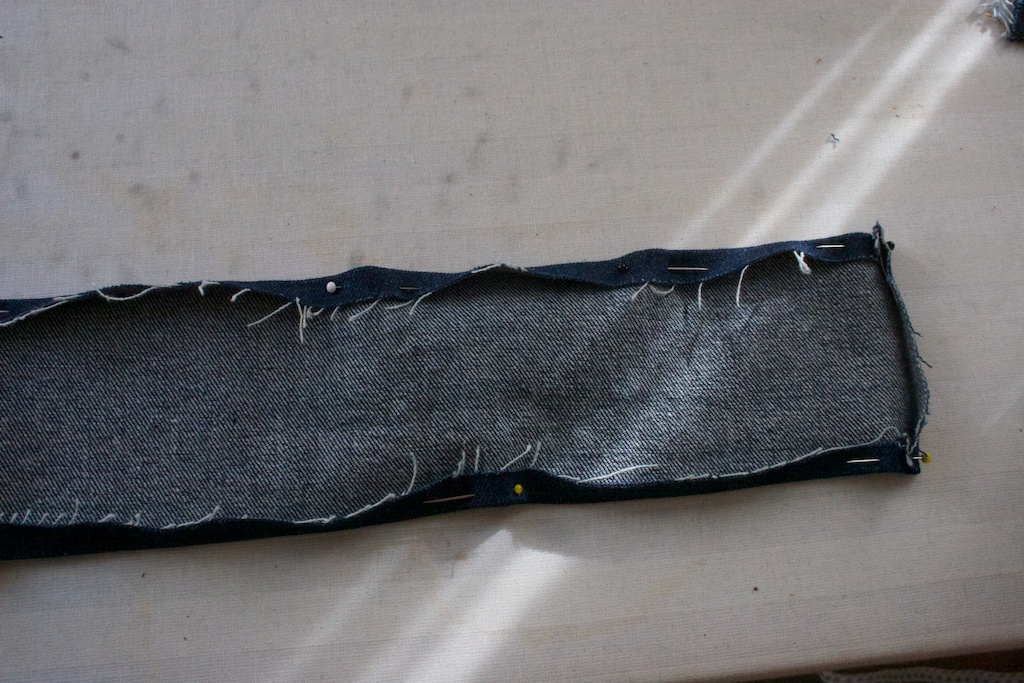 … and pin it to the inside of the jeans:
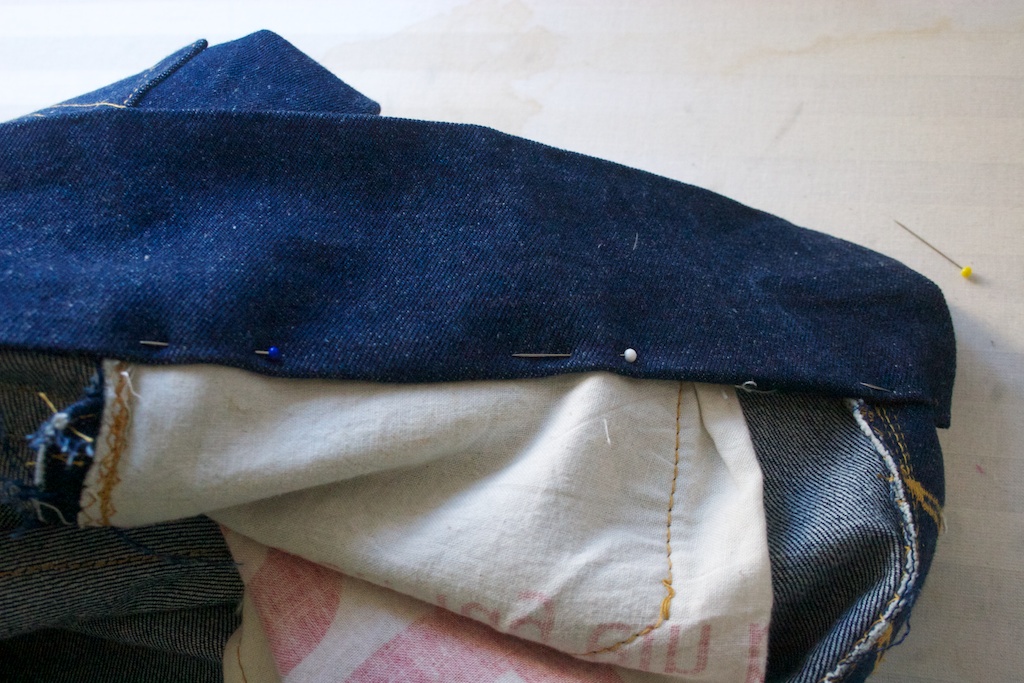 Then we pin it on the outside as well and sew it on.
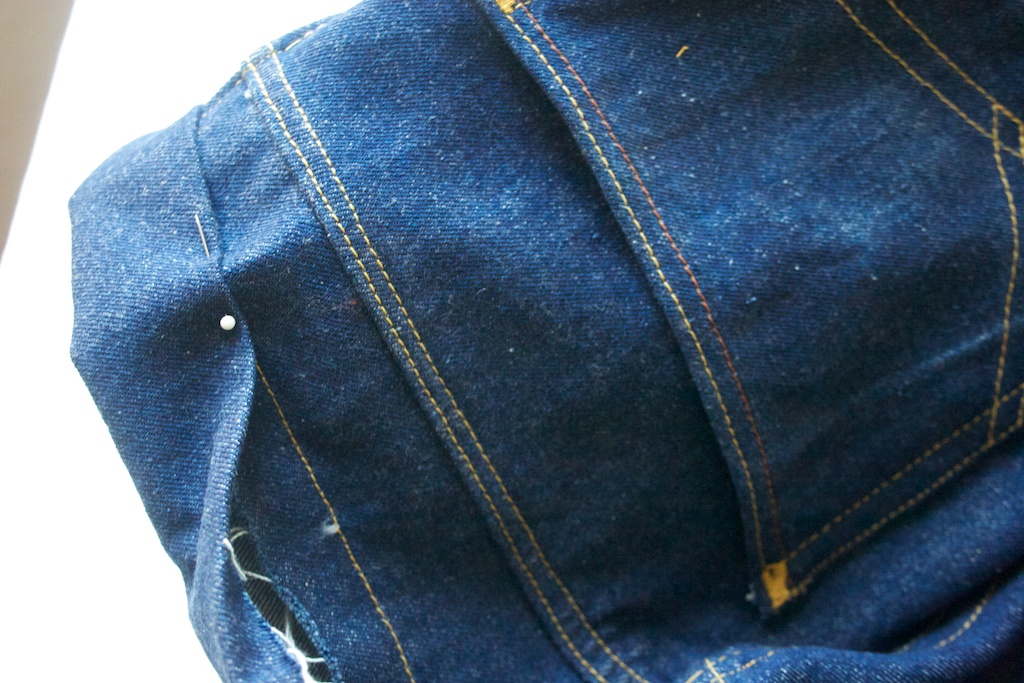
This is how it looks, after it has been sewed on.
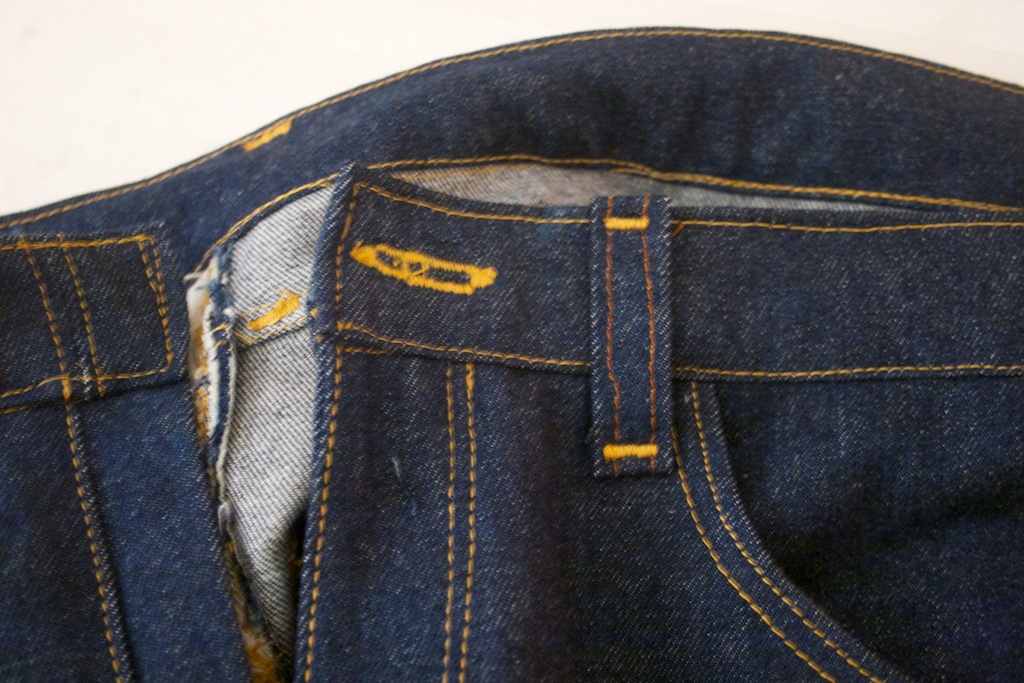
Also sew the buttonhole and attach the belt loops. .
.
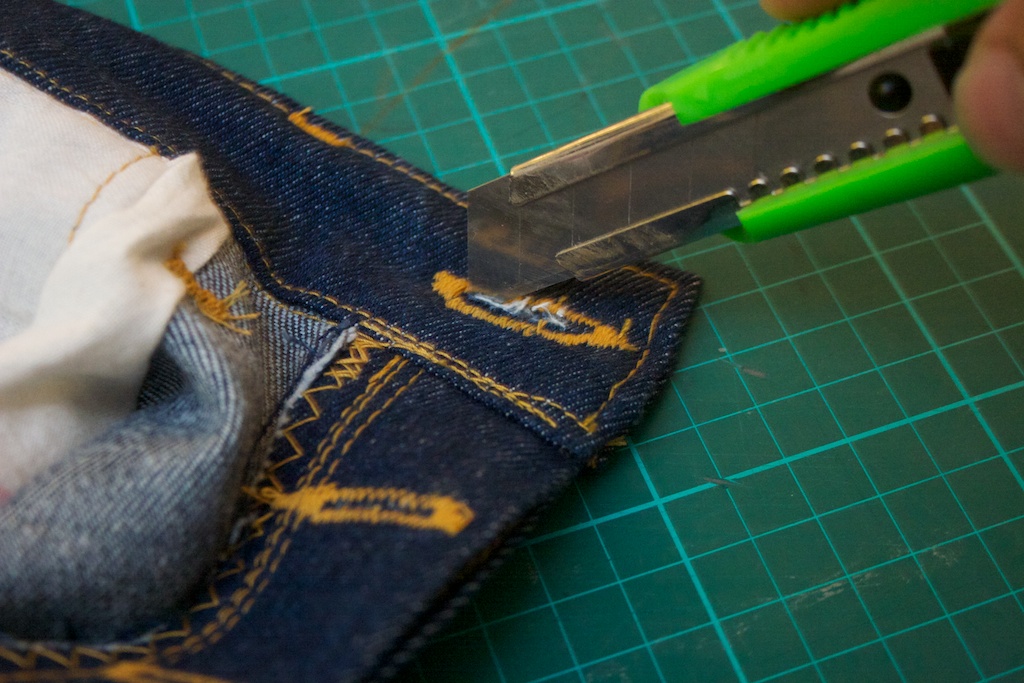
I used a cutter knive to cut the buttonholes. But I would recommend using the tool, which we took to unseam the old jeans at the beginning of this tutorial.
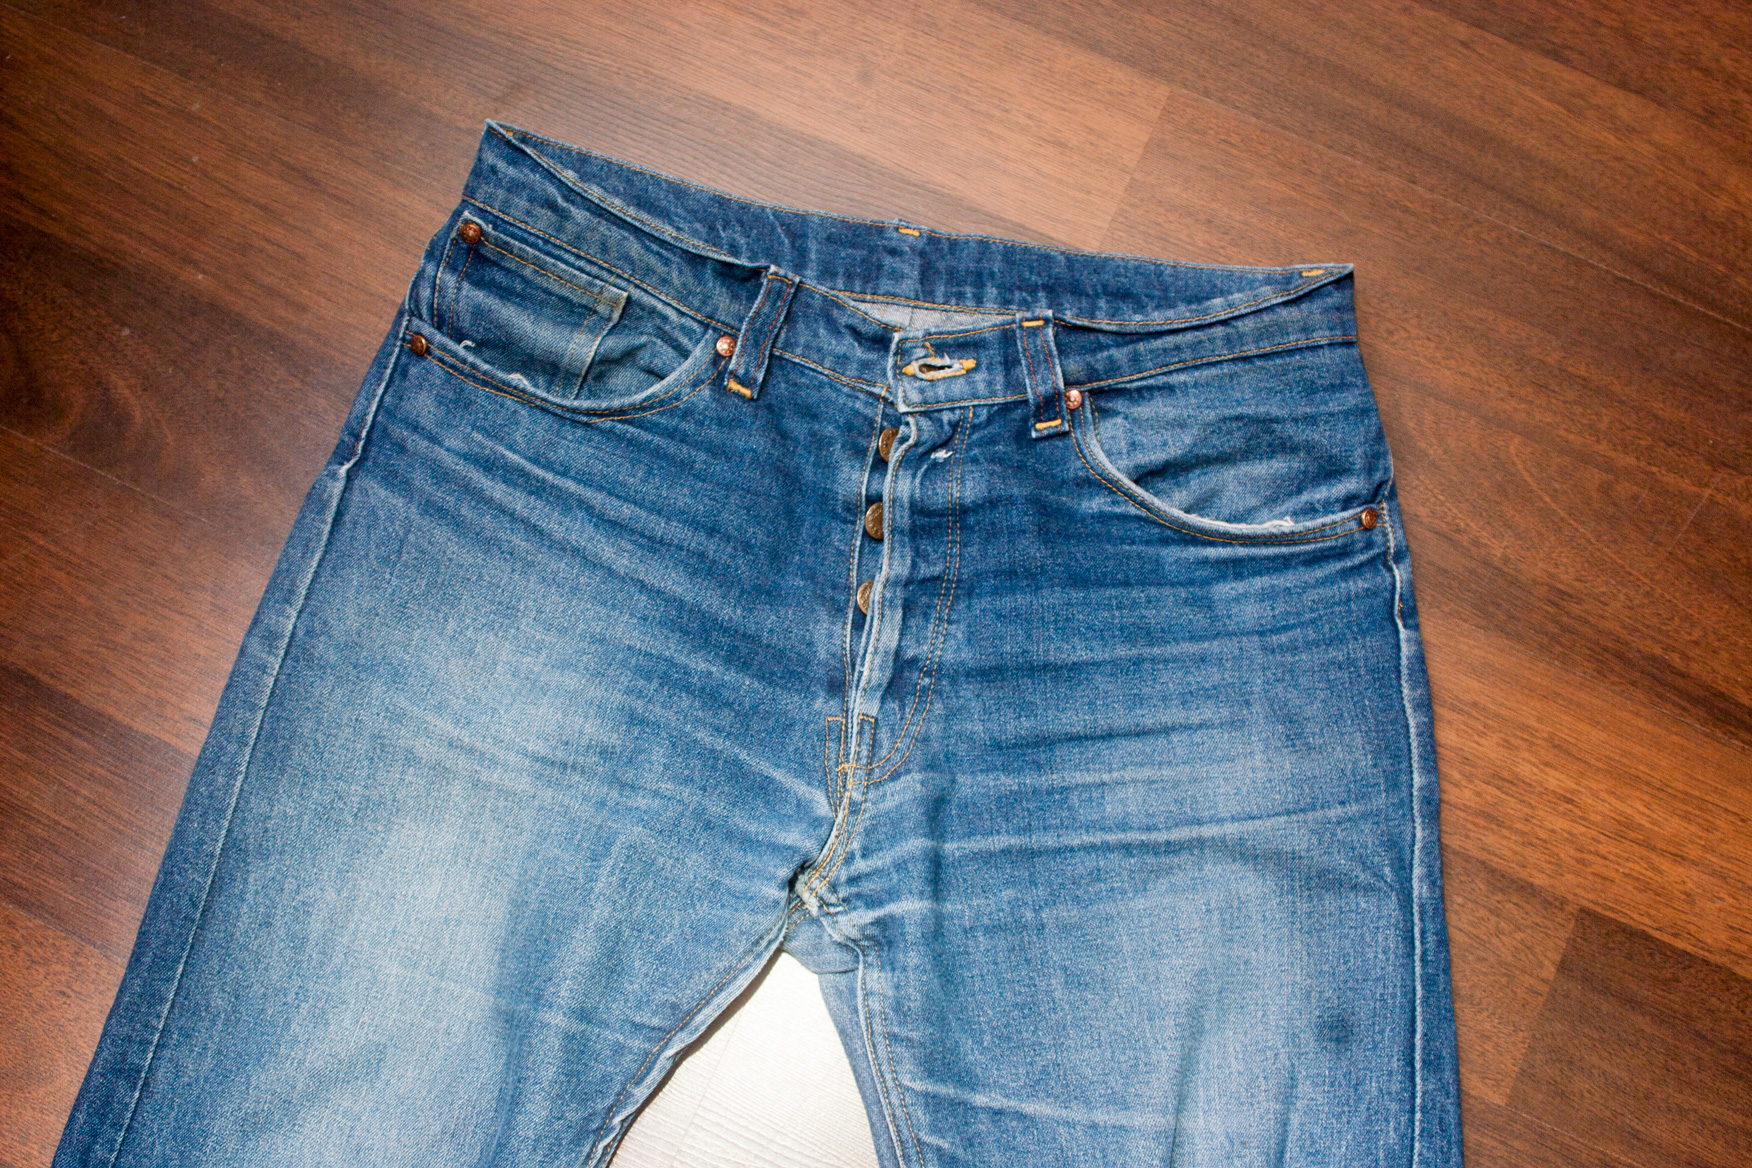
Now the buttons get hammered on:

The next step would be to hammer on the rivets. I have no picture of this, because I added them later on.
Now we adjust the length of the legs. If you dont want to wrap the end up but like to wear them like we did in the 1990s, you have to fold them under that they just are 1 cm above the floor at the back of your feet:

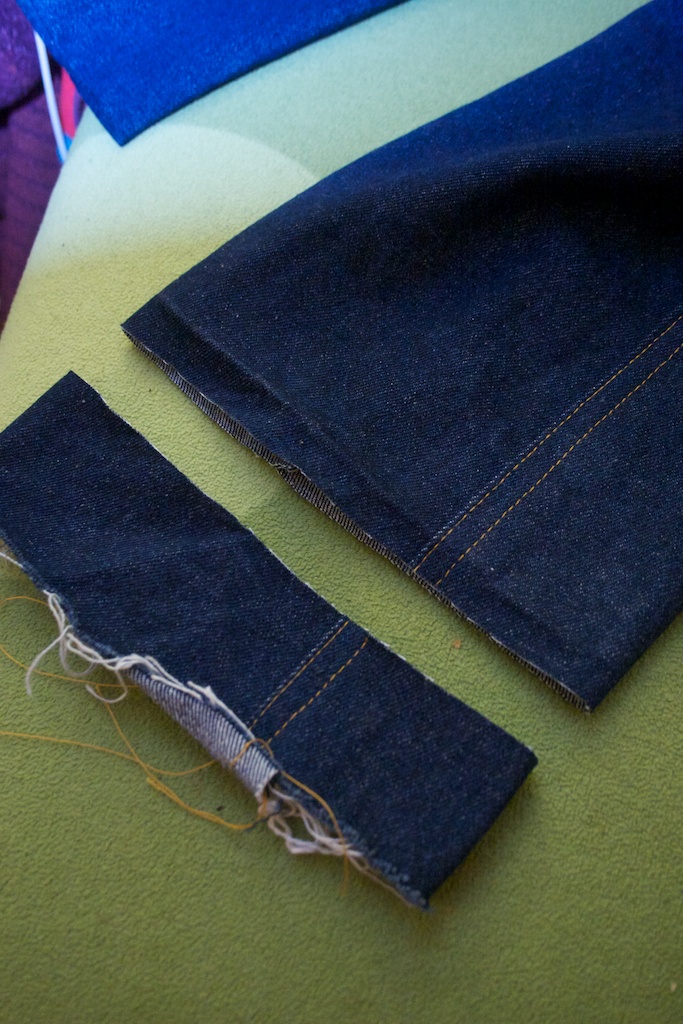 You add 2 to 3 cm seam allowance, fold it twice and sew it about 1 cm away from the edge:
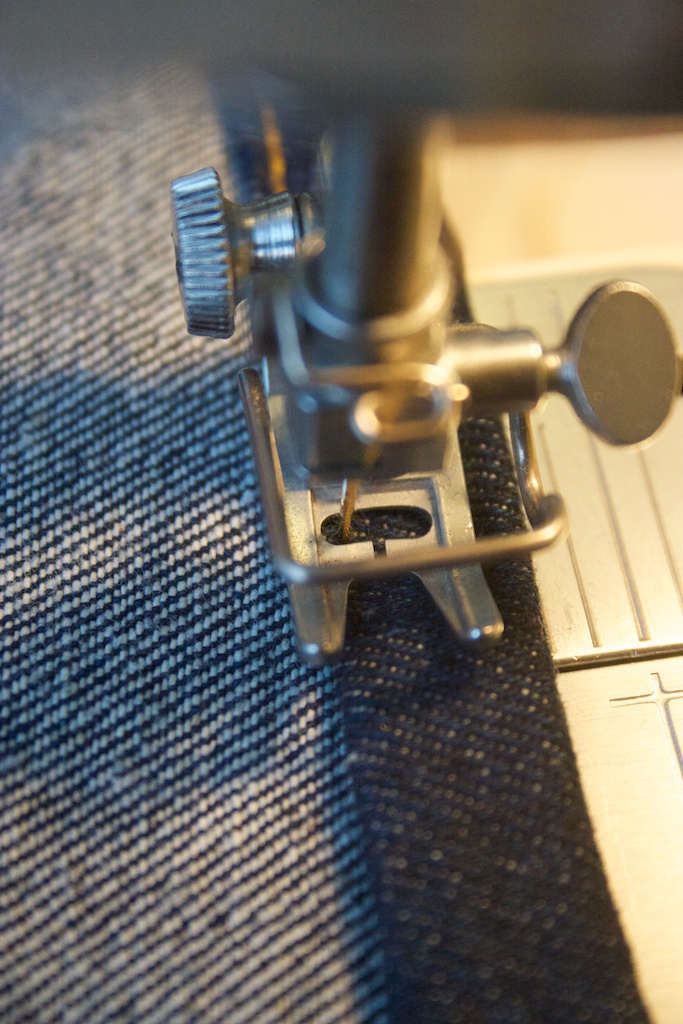
I hope you enjoyed this tutorial and I would be happy to hear from you if you have questions, comments or want to show your results.
Pattern making
Since this tutorial only showed, how to copy an existing pattern, I am actually working on the design of an own jeans pattern. Check out for future articles because I will add a note here, when I add a pattern making tutorial.
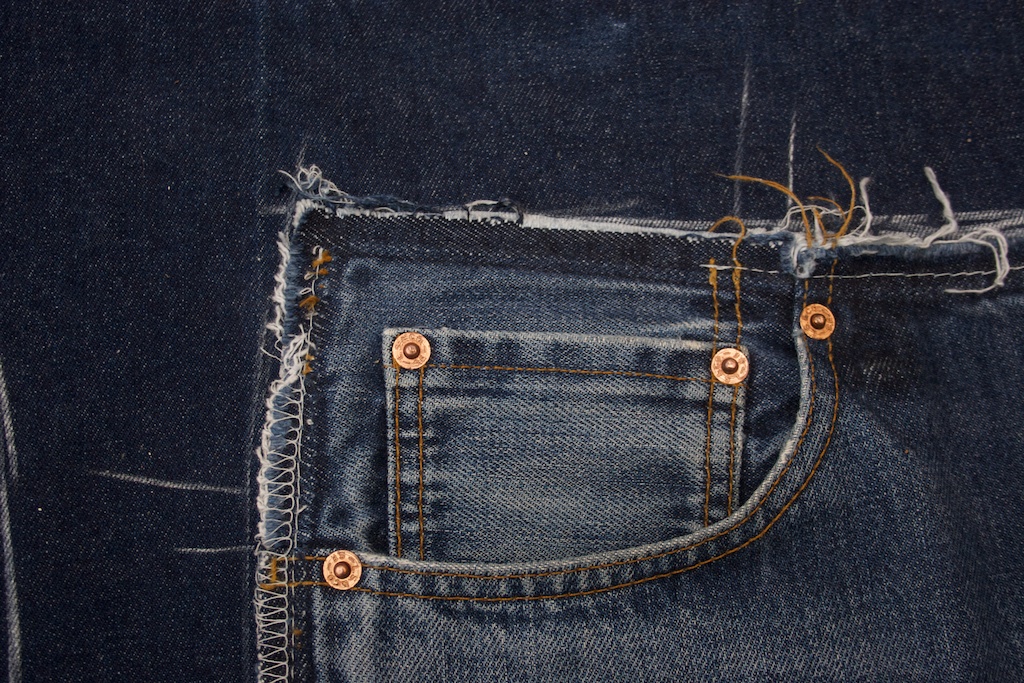
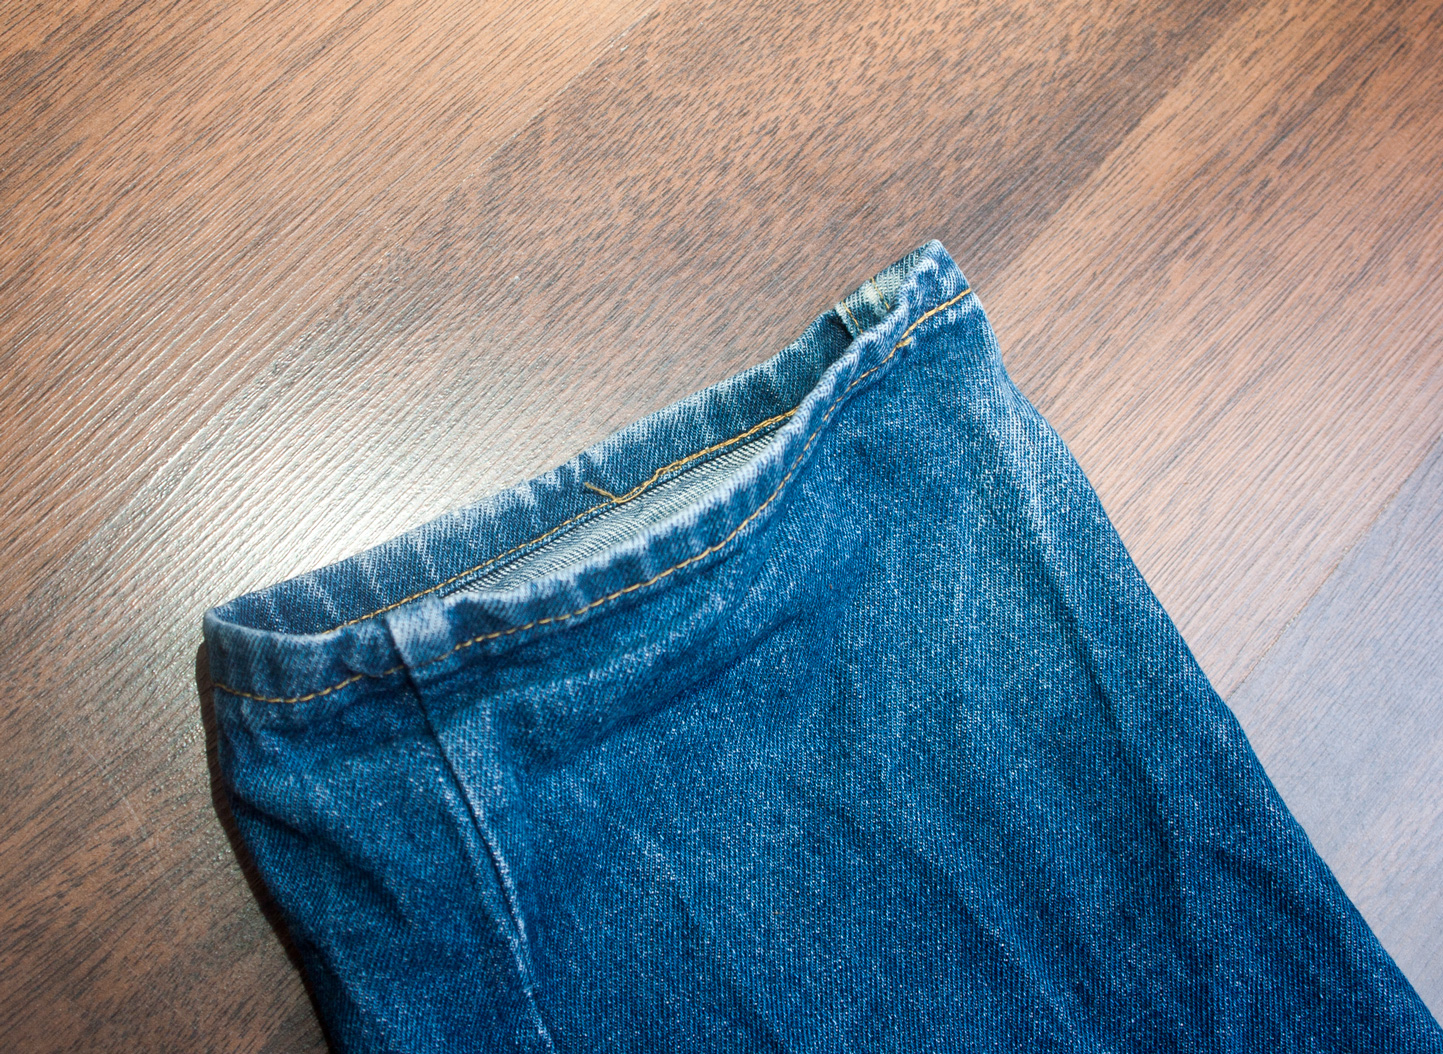
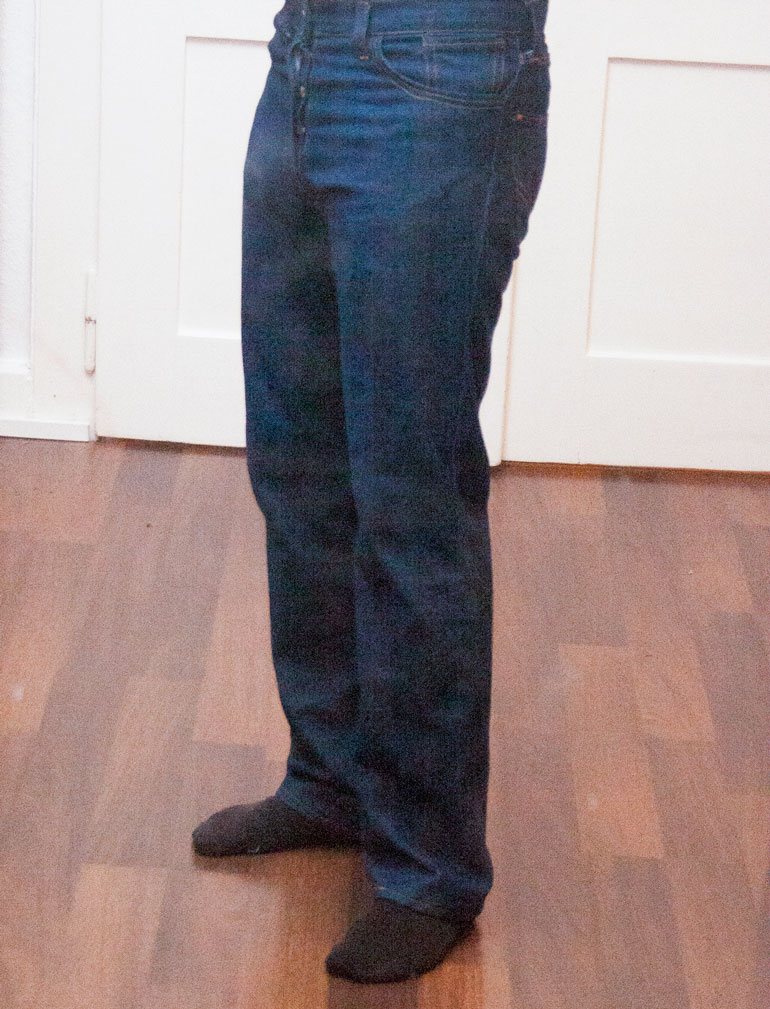
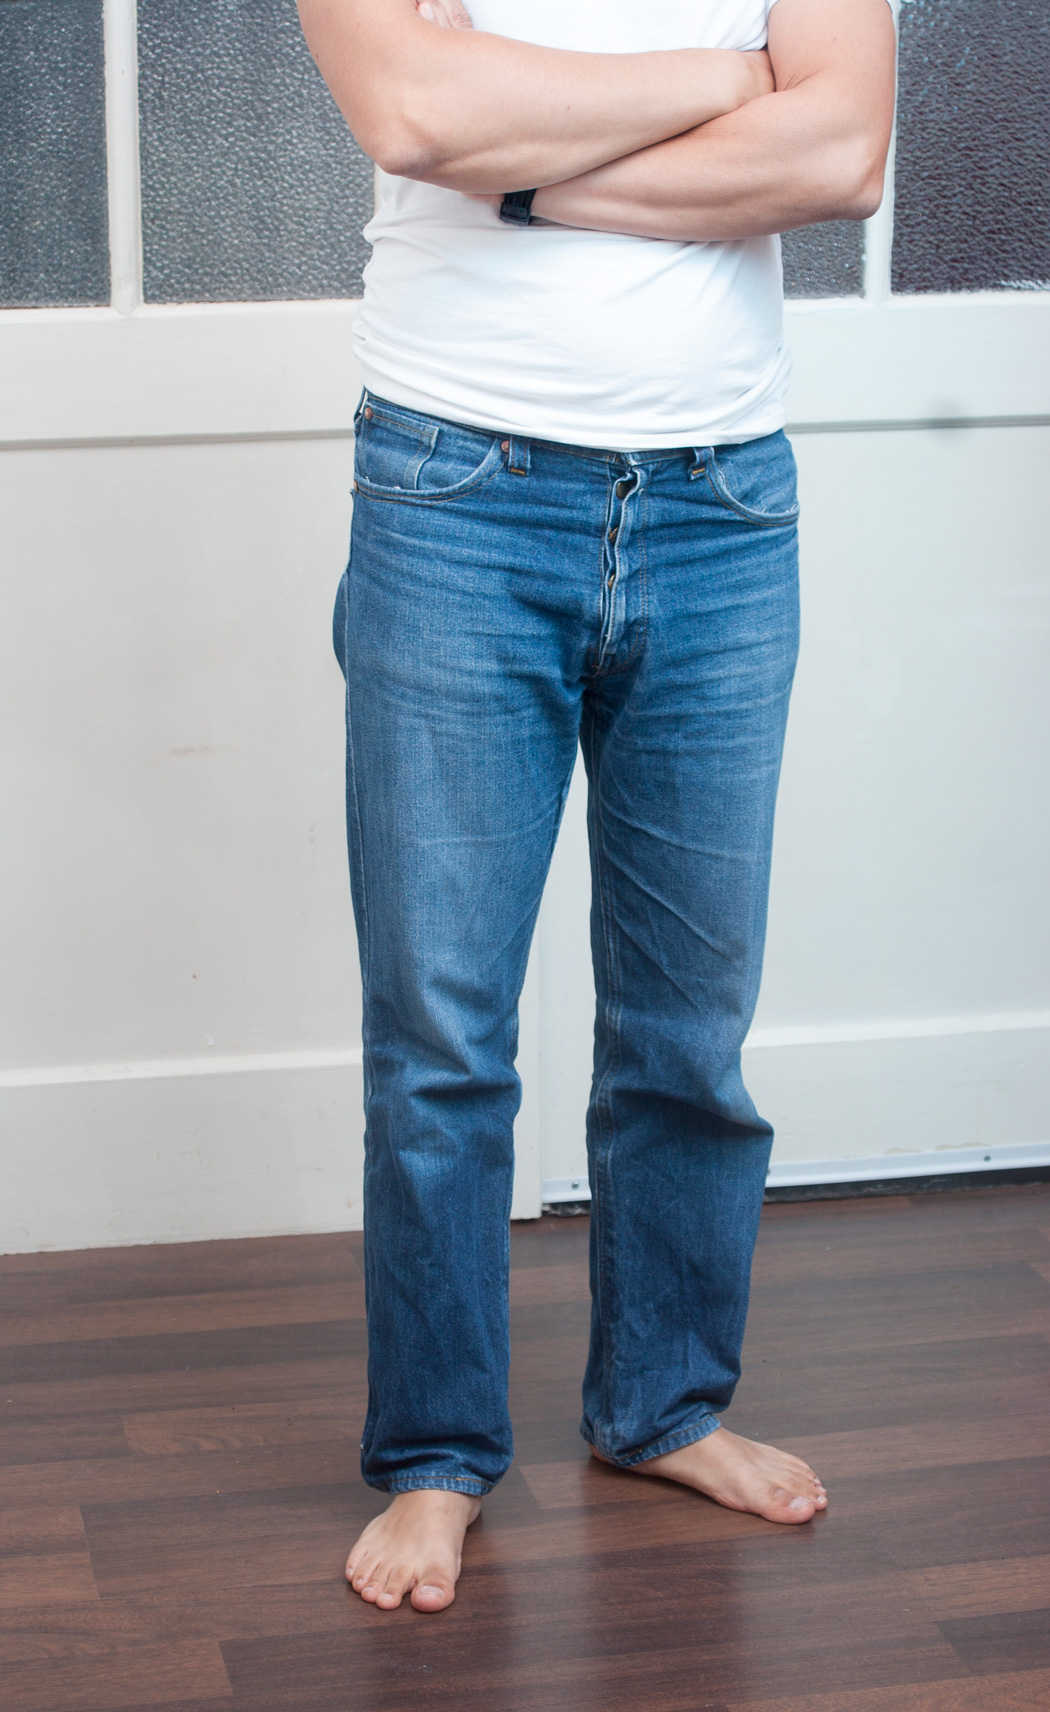
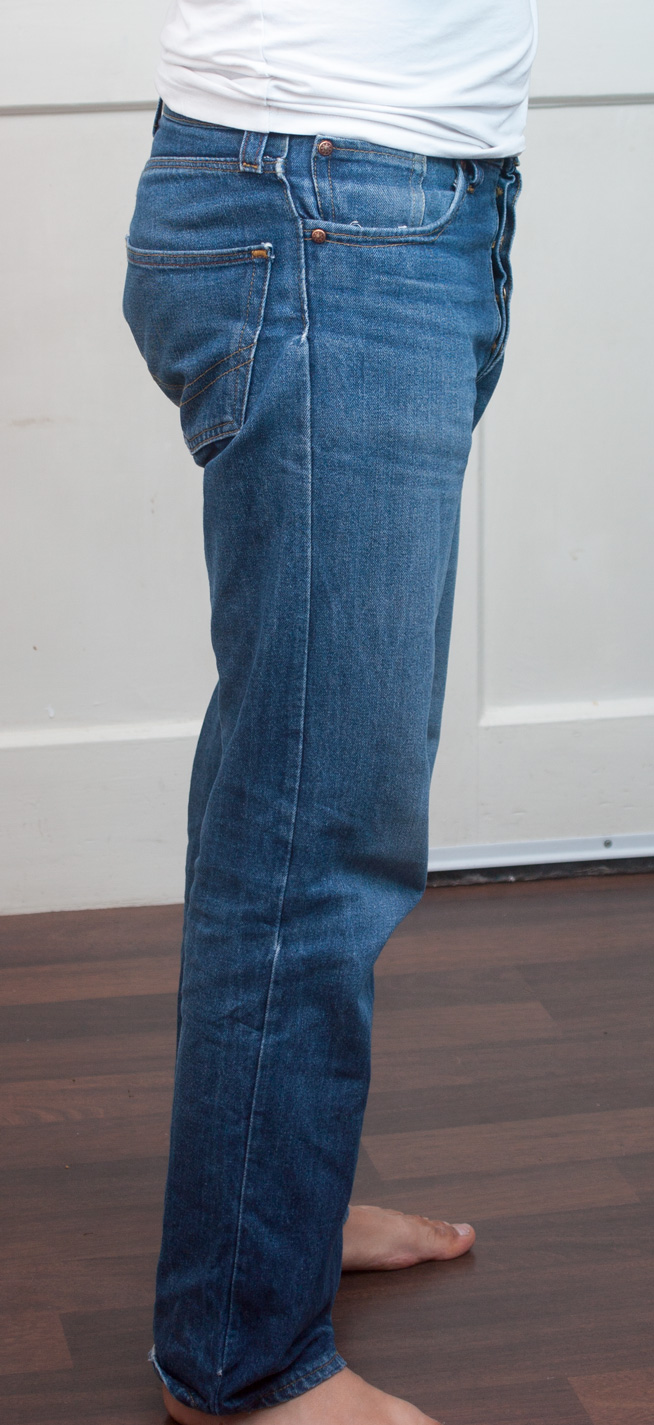
Supplement – this is what it looks like after 8 month of wearing nearly every day
The following pictures show the jeans after wearing it nearly every day for eight month.
Only after sewing the jeans I found out, that there is this big scene of denim heads with the ideas of authentic fades, fine seams, raw denim etc. Interestingly behind this scene stands the same idea that I followed by producing my own jeans: Getting away from environmental destructive washings that make the jeans maybe last for a few weeks only.
For further reading about raw denim I recommend the site rawrdenim.
What I did not took care of was a special treatment to gain stronger fades. Since I have small kids my jeans sees the washingmachine about every week. I also bought plain denim from a store around the corner, maybe 8 oz in weight. Still I think the fades look promising.
My next project will be a jeans made of 100 % raw hemp denim, since I always wanted to own a hemp jeans but found it very difficult to find one in 100 % hemp (there is no to do things by halves with me 😉 that also is indigo dyed.
If you go the oeko way, you often here, that blue jeans can’t be produced ecologically – I think this is not true. Even though indigo is a synthesized dye nowadays its chemical structure is still the same like the ancient indigo won from plants.
The biggest two problems – from an environmental point of view – of jeans are:
– pre fades / used look. That really threatens the workers health if there is no concern about health protection and it creates blue rivers in china.
– cotton. Even if it is ecologically grown it needs a lot of water and is bad for the soil.
These problems can be solved by two things.
Raw Denim reduzes chemical waste and health threatening treatments.
Hemp is the perfect fiber plant. It grows quick, needs no irrigation, and contains its own natural insecticides and herbicides. Even if it is not labeled as ecologically grown you can be sure, that it is ecological since it makes no sense to fertilize it or protect it against insects or other herbs.
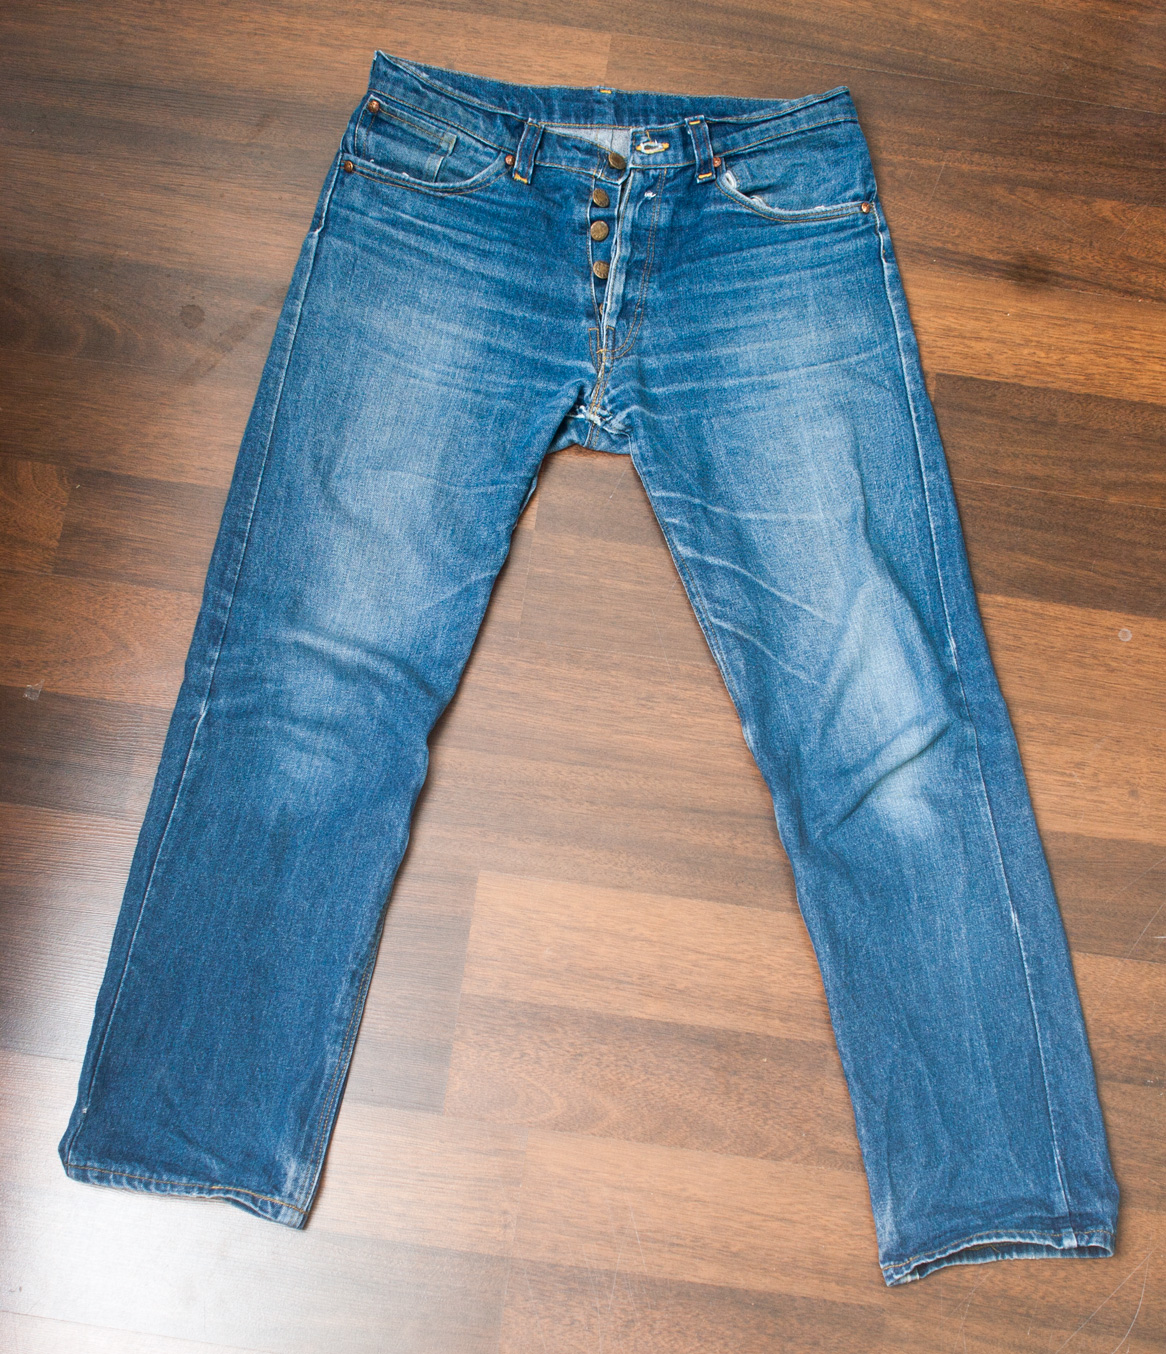
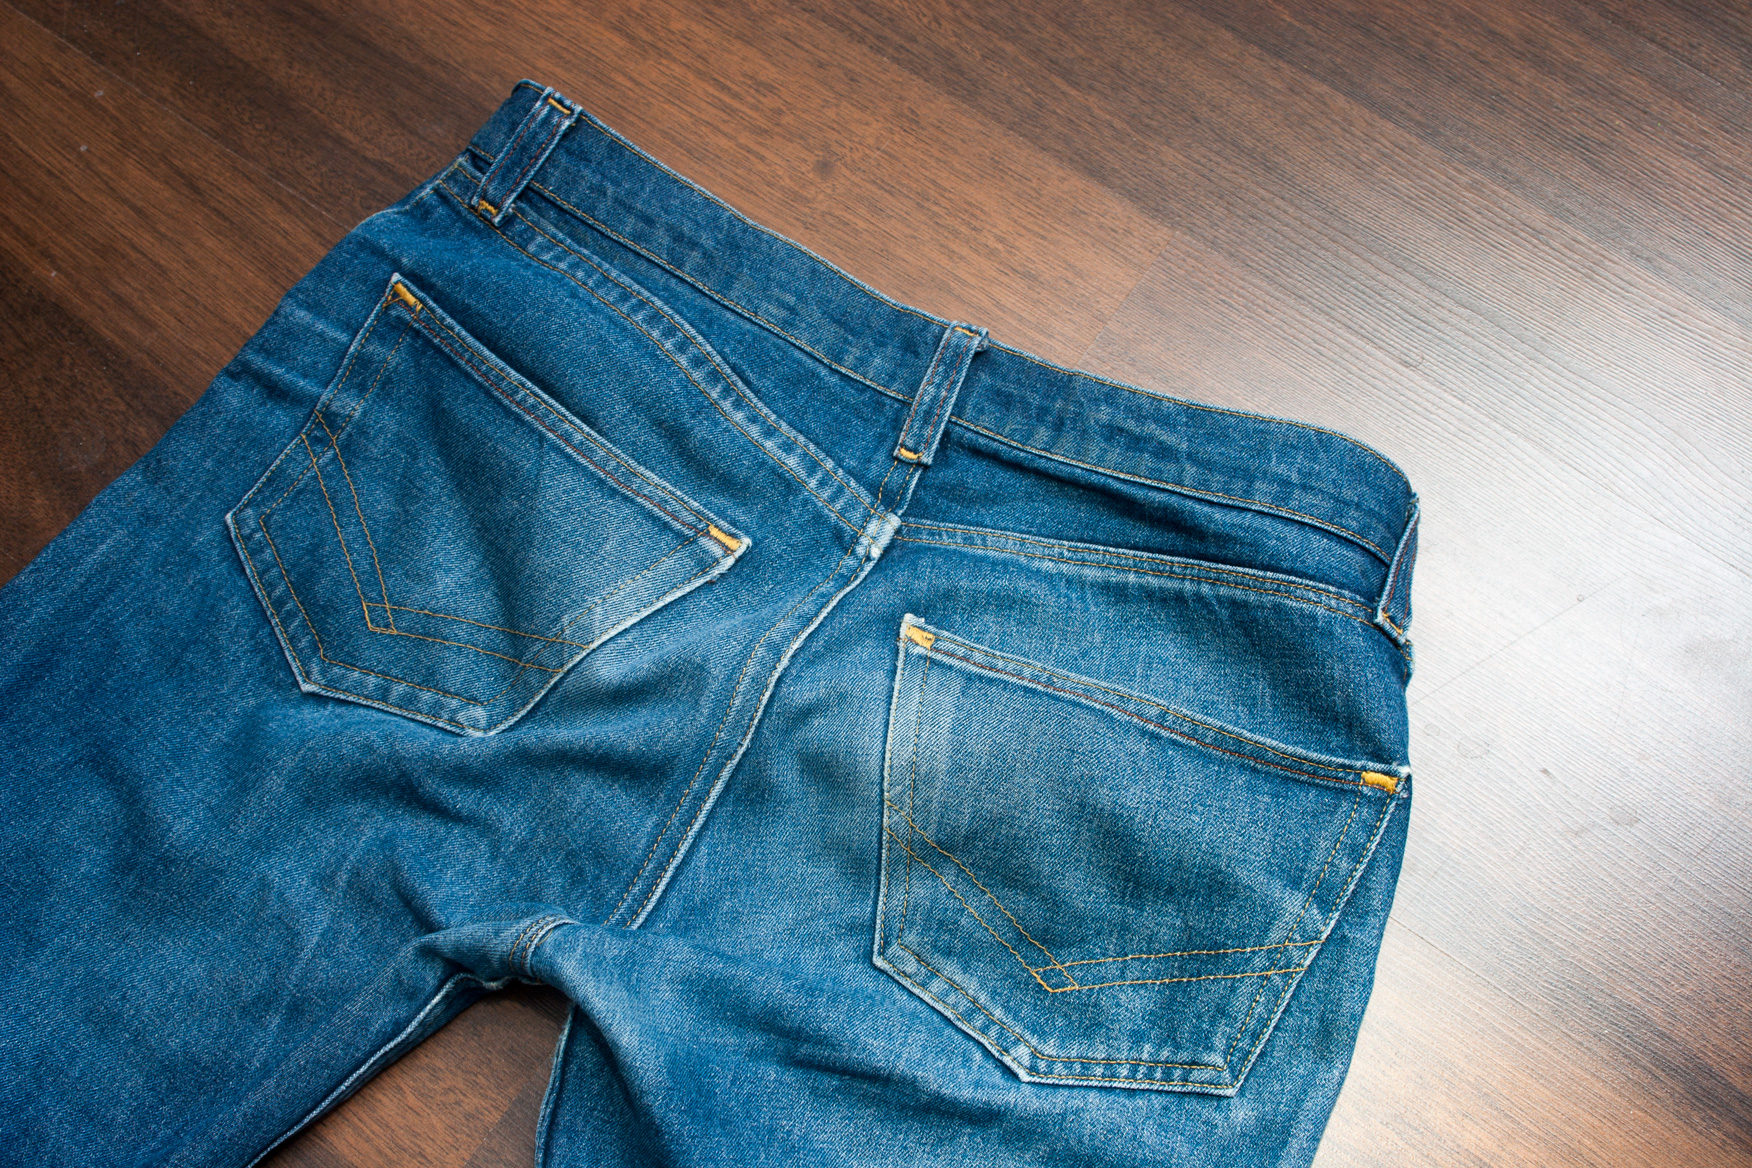
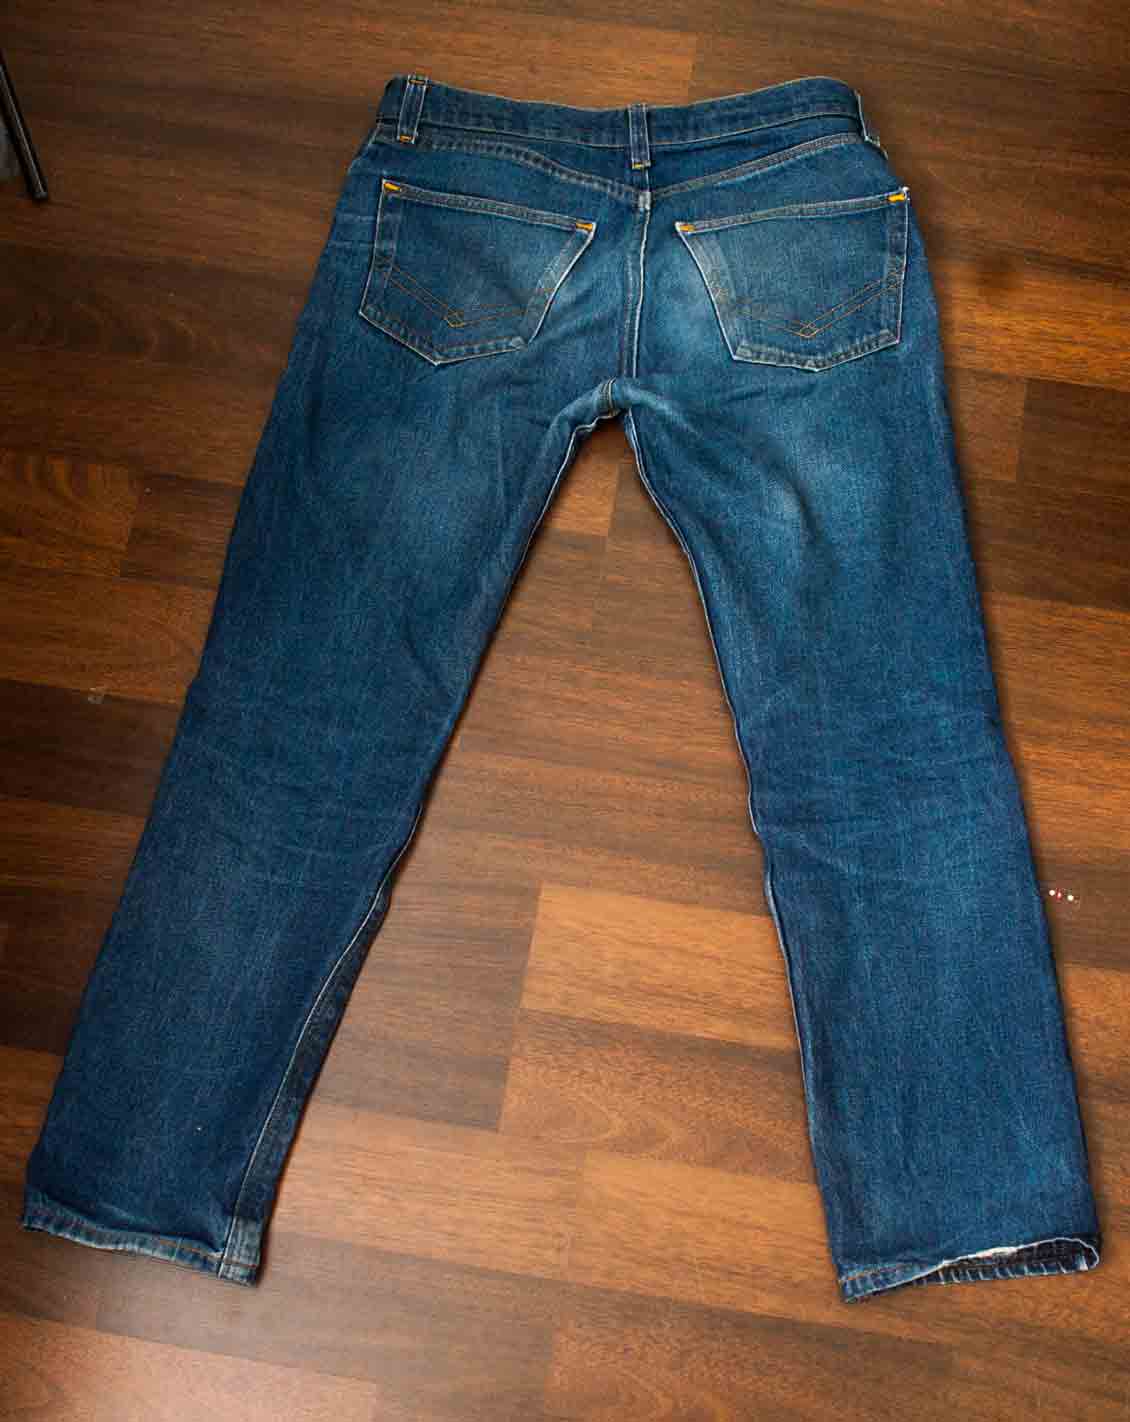

DIY RAW Denim Jeans back with decent fades. Fit picture.

Featured!
rawrdenim.com featured my jeans on their website’s fade friday!
Free Pattern for Download
I add a free PDF of a pattern that I designed myself using two brilliant books about pattern design. The PDF by now only is available in the size W31 L34 but other sizes will be added later on.
The first page of the PDF shows an overview of the whole pattern in the scale 1:1. The other pages are in A3 size and can be attached to each other to complete the pattern.
The pattern may be printed and used for sewing even for commercial purpose. Any altering, editing, publishing or distribution of this pattern is allowed if I am mentioned as the original author of this pattern, where possible in form of a link to this page. Also it is imported that the same license will be granted to this new work derived from this pattern.
You can also send me your altered pattern so that I can publish it here on this site.
Here you will find detailed information about the license:

Jeans Regular Pattern by Kristian Heitkamp is licensed under a Creative Commons Attribution-ShareAlike 4.0 International License.
w30 l34 jeans regular pattern PDF download
w31 l34 jeans regular pattern PDF download
w32 l34 jeans regular pattern PDF download
If you sew your own jeans using this pattern I would be very happy about a message or even better a picture of your jeans.
Here is the link to the two books which explain the process of pattern design and grading in a very easy to follow way.
This one I used for grading:
Gareth Kershaw: Patternmaking For Menswear – amazon.com affiliate link
Gareth Kershaw: Patternmaking for menswear – amazon.co.uk affiliate link
This helped me to create the basic pattern from which I started to grade different sizes:
Patternmaking for Fashion Design by Helen Joseph Armstrong – amazon.com affiliate link
Patternmaking for Fashion Design by Helen Joseph Armstrong – amazon.co.uk affiliate link
Dieser Information ist großartig!
Ich liebe Distressed Jeans. Hier sieht man, wie man die selbst macht.
https://www.youtube.com/watch?v=UX9nMCmN1wc